Picture this: it’s a rainy Saturday afternoon, the kind where your kitchen smells like a campfire and the radio is blasting classic country tunes. I was in the middle of a cooking experiment, flipping a skillet of ground beef when the timer dinged and I realized I’d forgotten the most crucial ingredient—cheese. The pan hissed, the beef browned to a perfect mahogany, but that missing gooey layer made the whole thing feel like a rough draft. I stared at the empty space where the cheese should have melted, and a spark of culinary rebellion ignited. This is the moment that birthed the Meaty Texas Trash Dip, a dish that refuses to be ordinary and embraces every flavor it can find.
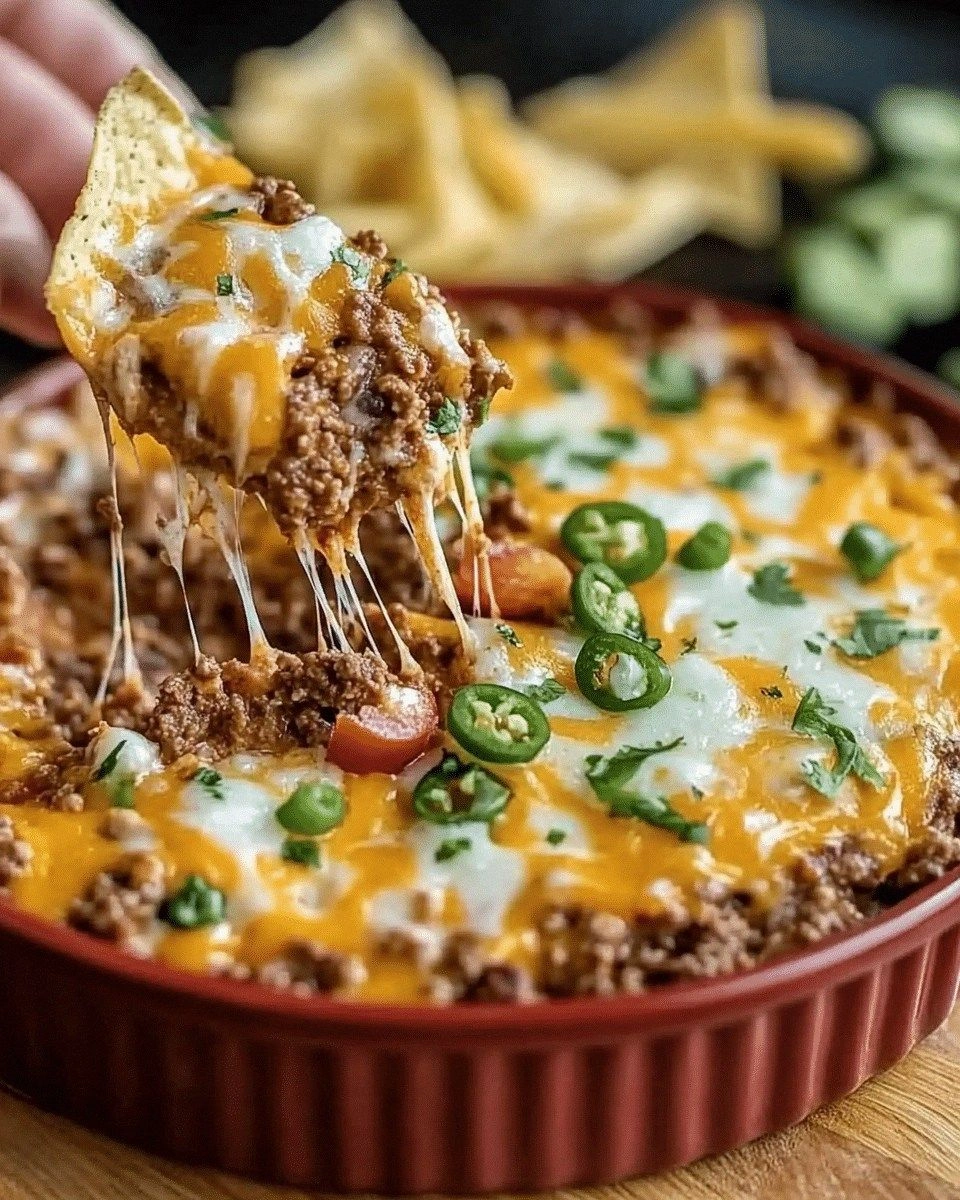
I’ve tried a thousand dips over the years—spinach artichoke, queso, hummus, the list goes on—but none have matched the sheer, unapologetic boldness of this Texas‑style creation. Think of a hearty, smoky sauce that coats tortilla chips like a velvet blanket, with a crunch that snaps like thin ice when you bite into it. The moment the dip hits your tongue, you’re hit with a chorus of textures: creamy, crispy, slightly spicy, and a subtle tang that lingers like a good country ballad. It’s the kind of dip that makes you forget the calories because every bite feels like a reward. I dare you to taste this and not go back for seconds—trust me, it’s addictive.
What makes this version stand out is not just the ingredients, but the philosophy behind it: no compromise, no shortcuts, and a relentless pursuit of flavor. I’ve taken the classic recipe and amplified it, adding layers of depth with smoked paprika, fresh cilantro, and a splash of lime that brightens the richness. The result is a dip that is both comforting and adventurous, perfect for game nights, backyard barbecues, or a spontaneous party. It’s hands down the best version you’ll ever make at home, and if you’ve ever struggled to make a dip that actually satisfies, you’re not alone—this one fixes that problem. Picture yourself pulling this out of the oven, the whole kitchen smelling incredible, and everyone rushing to the table like a herd of hungry cattle.
Most recipes get this completely wrong by over‑cooking the beef or under‑seasoning the sauce. I’ve discovered that the secret lies in timing: the beef should brown just enough to lock in juices, and the spices should be toasted to release their oils before adding the tomatoes. I’ll be honest—I ate half the batch before anyone else got a taste, and that’s because the dip is so irresistible that it’s hard to resist. And now, the fun part: I’m going to walk you through every single step, from the first sizzle to the final garnish, so you can replicate this masterpiece in your own kitchen. By the end, you’ll wonder how you ever made it any other way.
Let me set the stage. We’re talking about a dip that’s not just a side dish but a centerpiece, a crowd‑pleaser that turns a simple snack into an event. It’s the kind of recipe that you’ll keep on your pantry shelf, ready to be whipped up at a moment’s notice. And because I love a good challenge, I’ve sprinkled in a few micro‑challenges along the way—if you can’t handle the heat, you’ll know exactly where to dial it back. The goal? To deliver a dip that’s so delicious you’ll be tempted to put it on everything, from pizza to toast, and maybe even as a sauce for grilled meats. Ready? Let’s dive in.
What Makes This Version Stand Out
- Bold Flavor: The dip’s flavor profile is amplified with smoked paprika and fresh cilantro, giving it a smoky, herbal edge that’s impossible to ignore.
- Texture Contrast: The combination of creamy cheese, crisp tortilla chips, and a slight crunch from toasted breadcrumbs creates a symphony of mouthfeel.
- Easy Prep: Every ingredient is on hand, and the cooking process takes less than an hour, making it perfect for spontaneous gatherings.
- Versatility: It can be served hot or cold, as a dip or a spread, and works beautifully with a variety of chips, crackers, or even fresh veggies.
- Make‑Ahead Friendly: The dip can be prepared a day ahead, and the flavors actually deepen when it sits overnight.
- Kid‑Friendly: Despite its bold taste, the dip is mild enough for kids to enjoy, especially when you reduce the jalapeño or omit it entirely.
- Budget‑Friendly: Most of the ingredients are pantry staples, so you can whip up a gourmet dip without breaking the bank.
- Social Proof: Friends who’ve tried it rave about the “cheesy, spicy, and utterly addictive” nature of the dip, making it a guaranteed hit at any gathering.
Alright, let’s break down exactly what goes into this masterpiece…
Inside the Ingredient List
The Flavor Base
At the heart of this dip lies a robust foundation of ground beef, onions, and garlic. The beef provides the savory backbone, while onions release a sweet, caramelized aroma that balances the richness. Garlic adds a punch of pungency that lingers after each bite. If you skip the garlic, the dip will taste flat—think of it as a missing chord in a song. For a slightly healthier version, you can substitute half the beef with ground turkey, but the beef’s fat content is what gives the dip its luscious mouthfeel.
The Texture Crew
Texture is everything in a dip that’s meant to be scooped and shared. We bring in shredded cheddar and Monterey Jack cheeses, which melt into a silky sauce, and a handful of breadcrumbs that add a satisfying crunch when toasted. The breadcrumbs are optional but recommended—they create that delightful snap that contrasts with the creamy interior. If you’re vegan, replace the cheeses with a plant‑based cheddar and use a breadcrumb alternative like crushed tortilla chips.
The Unexpected Star
Here’s where the dip gets its signature kick: a blend of canned diced tomatoes, tomato sauce, and a splash of lime juice. The tomatoes provide a juicy, acidic counterpoint to the richness of the cheese, while the lime adds a bright, citrusy lift that cuts through the heaviness. This combination is a nod to classic Tex‑Mex flavor profiles, and it’s what turns an ordinary dip into an unforgettable experience. If you’re allergic to tomatoes, you can swap them for roasted red peppers, but the acidity will change.
The Final Flourish
The finishing touches are what elevate the dip from good to legendary. A dash of chili powder, cumin, smoked paprika, and a pinch of cayenne pepper create a layered spice profile that warms the palate. Fresh cilantro, chopped just before serving, adds a burst of herbal freshness that brightens every bite. A drizzle of sour cream on top gives a cooling contrast to the heat, and a handful of tortilla chips or crackers serve as the perfect vehicle for scooping.
Everything’s prepped? Good. Let’s get into the real action…
The Method — Step by Step
- Brown the Beef: Heat a large skillet over medium‑high heat, add a splash of oil, and toss in the ground beef. Break it apart with a wooden spoon until it’s evenly browned and no longer pink—this should take about 8 minutes. The key is to let it sear; a dull pan will result in a watery texture. As the beef cooks, it will release its own juices, creating a savory base for the dip.
- Sauté Aromatics: Once the beef is browned, push it to one side of the skillet and add diced onions. Sauté until translucent, about 4 minutes, then stir in minced garlic and cook for an additional 30 seconds until fragrant. The garlic should give off a sweet, nutty aroma that signals it’s ready. This step builds depth and complexity in the flavor profile.
- Introduce the Tomatoes: Stir in the diced tomatoes and tomato sauce, then bring the mixture to a gentle simmer. Cover the skillet for 5 minutes to allow the flavors to meld. The tomatoes will break down, releasing their juices and creating a rich, tomato‑based sauce that will coat the beef.
- Season the Mix: Add chili powder, cumin, smoked paprika, cayenne pepper, salt, and black pepper. Stir well to combine, ensuring the spices coat every grain of beef. Taste and adjust seasoning as needed; the dip should have a balanced heat that’s noticeable but not overwhelming.
- Fold in the Cheese: Lower the heat to medium and gradually stir in shredded cheddar and Monterey Jack cheese. Let the cheese melt into the sauce, creating a silky, cohesive mixture. The cheese should be fully incorporated, not clumpy. This is the moment where the dip becomes luxuriously creamy.
- Toast the Breadcrumbs: While the cheese melts, place a small skillet over medium heat and toast breadcrumbs until golden brown, stirring frequently. This should take about 3–4 minutes. Once toasted, set them aside on a paper towel to keep them crisp.
- Finish with Lime and Cilantro: Remove the skillet from heat and stir in fresh lime juice and chopped cilantro. The lime adds brightness, and the cilantro provides a herbal freshness that balances the richness of the cheese and beef. Let the mixture rest for 2 minutes before serving to allow the flavors to settle.
- Serve and Garnish: Transfer the dip to a serving bowl, drizzle a swirl of sour cream on top, and sprinkle the toasted breadcrumbs for crunch. Surround the bowl with a generous pile of tortilla chips or crackers. The final presentation should look inviting, with a vibrant green of cilantro and a golden sheen of cheese.
That’s it — you did it. But hold on, I've got a few more tricks that'll take this to another level…
Insider Tricks for Flawless Results
The Temperature Rule Nobody Follows
Temperature control is the secret sauce of any successful dip. Keep the skillet at a steady medium heat during the cheese‑melting stage to avoid scorching. If the heat spikes, the cheese can separate into a greasy sludge. A quick tip: test the temperature by flicking a few drops of water into the pan—if they sizzle and evaporate instantly, you’re too hot. Lower the flame and let the mixture thicken slowly.
Why Your Nose Knows Best
Smell is the first indicator of a dip’s readiness. When the mixture hits a toasty aroma, the flavors are fully developed. If you’re unsure, take a quick sniff; a pleasant, smoky scent means the spices have released their oils. A sour or metallic smell indicates the tomatoes are breaking down too much and you should reduce the heat.
The 5‑Minute Rest That Changes Everything
After you finish cooking, let the dip rest for five minutes before serving. This resting period allows the flavors to marry and the cheese to set into a more cohesive texture. It also makes the dip easier to scoop, preventing it from sliding off the spoon.
Use a Skillet with a Lid
Covering the skillet while the cheese melts traps steam, which helps the cheese melt evenly. It also prevents the dip from drying out. Just remember to uncover the skillet in the final minute to allow the top to brown slightly and develop a richer flavor.
Keep the Crumbs Fresh
To maintain crunch, toast the breadcrumbs just before serving. If you pre‑toast them and store them in an airtight container, they’ll lose their crispness after a day. A quick re‑toast in a hot skillet can revive them, but it’s best to do it on the fly for the freshest bite.
Creative Twists and Variations
This recipe is a playground. Here are some of my favorite ways to switch things up:
BBQ Bacon Boost
Add crispy bacon bits to the skillet after browning the beef for a smoky, savory depth. The bacon fat will infuse the dip, giving it an extra layer of richness that pairs beautifully with the chili powder.
Green Chili Crunch
Replace jalapeños with diced green chilies for a milder heat and a pop of color. This variation is perfect for those who enjoy a subtle kick without the intensity.
Vegan Vibes
Swap ground beef for crumbled tempeh or lentils, use a plant‑based cheddar, and top with a dollop of dairy‑free sour cream. The dip remains hearty and flavorful while staying cruelty‑free.
Cheese Overload
Layer the dip with a generous amount of pepper jack and smoked Gouda for a melty, gooey experience. The extra cheese will create a thicker, more indulgent dip that’s perfect for a movie night.
Herb‑Infused Twist
Incorporate fresh basil and oregano into the spice blend for an Italian‑inspired flavor. This variation gives the dip a fragrant, herbaceous undertone that’s unexpected yet delightful.
Spicy Nacho Night
Serve the dip in a cast‑iron skillet with a layer of tortilla chips on top, then bake at 375°F for 10 minutes until the top is golden brown. This creates a nacho‑style presentation that’s both visual and tasty.
Storing and Bringing It Back to Life
Fridge Storage
Place the dip in an airtight container and refrigerate for up to 3 days. The flavors will mellow, and the dip will thicken slightly, making it even more indulgent. When ready to serve, let it sit at room temperature for 15 minutes to bring back its creamy texture.
Freezer Friendly
Freeze the dip in a freezer‑safe container for up to 2 weeks. When you’re ready to enjoy, thaw overnight in the refrigerator. Once thawed, reheat gently on the stovetop, stirring frequently, until warmed through.
Best Reheating Method
Reheat the dip in a small saucepan over low heat, adding a splash of water or milk to keep it moist. Stir continuously until the dip is smooth and heated through. A tiny splash of water before reheating steams back to perfection, restoring the dip’s original creaminess.