It was a Friday night, the kind of evening where the only thing I could think about was the last bite of a cookie that had slipped through my fingers while I was scrolling through a recipe blog. I stared at the empty fridge, the pantry that seemed to have lost its magic, and the inevitable craving that had been building since I had opened the bag of cereal that morning. I grabbed a handful of crunchy, white flakes and tossed them into a pot, hoping the heat would coax something sweet out of them. The result? A sad, soggy mess that looked more like a science experiment gone wrong than a treat. That night, I made a promise to myself that I would never again let a simple snack feel like a disappointment.
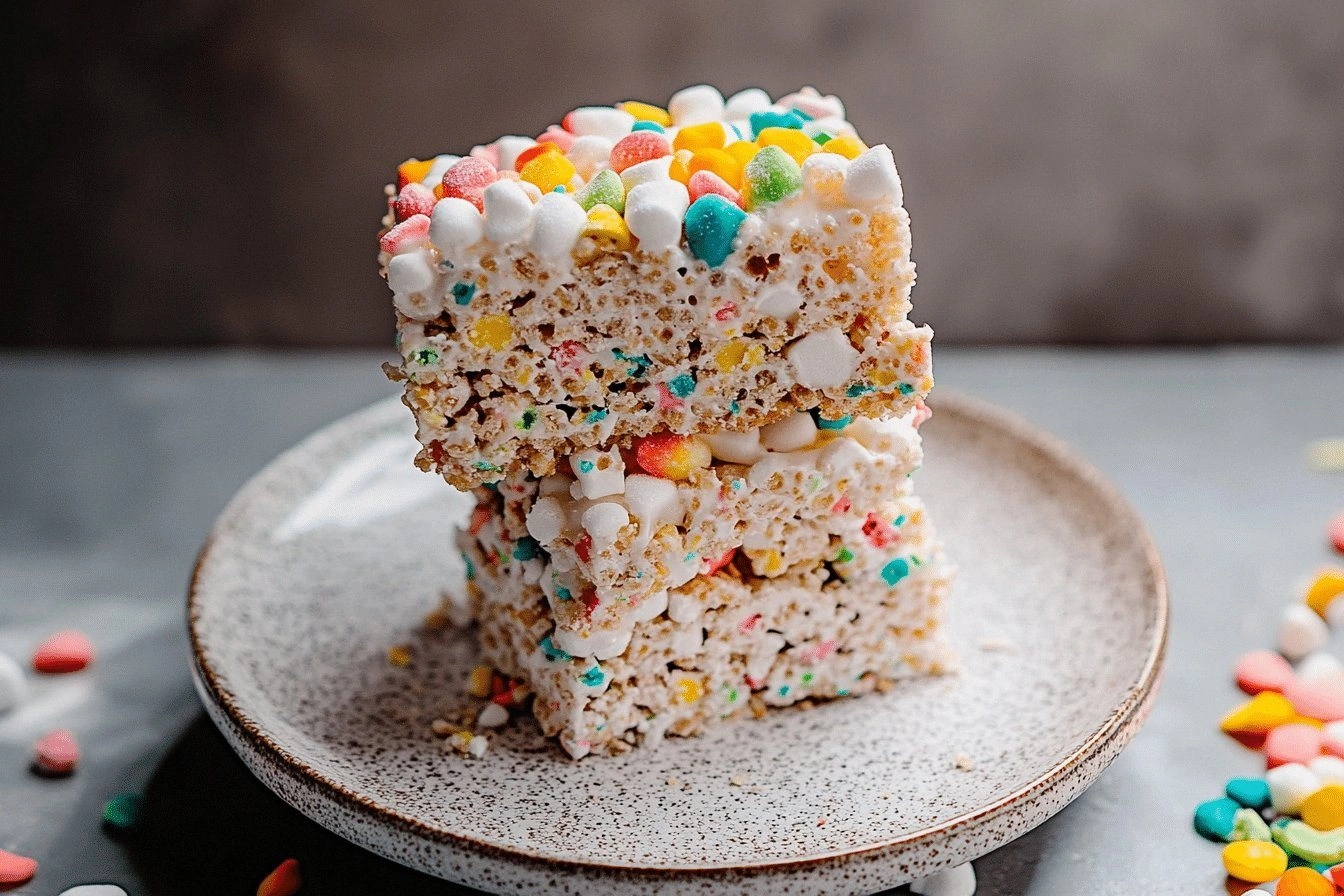
Fast forward to this very moment, and I’m standing in my kitchen with a bowl of crispy rice cereal, a handful of mini marshmallows, a stick of butter, a teaspoon of vanilla, and a rainbow of sprinkles that practically glitter in the light. The aroma that hits my nose is a mix of toasted corn, sweet marshmallow, and a faint buttery sweetness that feels like a hug in a bowl. The sound of the marshmallows melting into the cereal is a gentle hiss, almost like a lullaby for my taste buds. When the mixture is ready, the texture is a delightful combination of crunch and chew, with the sprinkles adding a burst of color and a subtle crunch that dances across my tongue. I dare you to taste this and not go back for seconds.
This version of funfetti marshmallow cereal bars is hands down the best you’ll ever make at home because it takes the classic snack and turns it into a portable, bite‑size party that can be made in minutes. It doesn’t require an oven or a fancy mixer; it only needs a pot, a spatula, and a sprinkle of imagination. The secret lies in the way the marshmallows melt into a silky binder that holds the cereal together, while the butter adds a silky richness that elevates every bite. The rainbow sprinkles aren’t just a garnish; they’re a visual cue that turns each bar into a celebration of color and flavor. Picture yourself pulling this out of the pan, the whole kitchen smelling incredible, and watching the bars set into a glossy, edible canvas of joy.
Okay, ready for the game‑changer? Let me walk you through every single step — by the end, you’ll wonder how you ever made it any other way. I’ll share the technique that keeps the bars from sticking, the trick that ensures the sprinkles stay bright, and the timing that guarantees the perfect chew. I’ll also drop a little hack that will save you from the dreaded sticky mess that usually follows a marshmallow‑based recipe. Stay with me here — this is worth it.
What Makes This Version Stand Out
- Texture: The crispy rice cereal provides a satisfying crunch that contrasts beautifully with the chewy marshmallow binder, creating a multi‑sensory experience that feels both nostalgic and sophisticated.
- Flavor: A splash of vanilla extract lifts the sweetness of the marshmallows, adding a warm, aromatic undertone that makes each bite feel like a hug.
- Color: Rainbow sprinkles aren’t just decoration; they add a pop of color that turns every bar into a mini work of art, making the snack as visually appealing as it is delicious.
- Convenience: No oven, no baking sheet, no waiting. The entire process takes less than ten minutes from start to finish, making it perfect for busy mornings or after‑school snack time.
- Portability: The bars hold together firmly, making them ideal for packing in lunchboxes or taking on road trips without the risk of them falling apart.
- Make‑ahead Potential: Once set, the bars keep well in an airtight container for up to a week, and they can even be frozen for longer storage without losing their delightful crunch.
- Ingredient Quality: Using high‑quality, all‑natural ingredients ensures that each bar is not only tasty but also free from artificial additives, giving you a guilt‑free treat.
- Audience Appeal: Whether you’re a kid, a teenager, or a nostalgic adult, the funfetti bars deliver a sense of childhood joy that resonates across generations.
Alright, let's break down exactly what goes into this masterpiece…
Inside the Ingredient List
The Flavor Base
The crispy rice cereal is the foundation of the bars, providing the light, airy crunch that makes every bite exciting. It also serves as the structural support that keeps the marshmallow binder from collapsing under its own weight. If you skip this ingredient, the bars will become dense and unappetizing, lacking that signature snap. For a subtle twist, you can use a mix of rice and corn flakes to add a hint of nuttiness.
The Texture Crew
Mini marshmallows are the heart of the recipe, melting into a sticky, chewy medium that binds the cereal together. The size of the marshmallows matters; smaller pieces melt faster and create a smoother texture, while larger chunks add a chewy surprise. If you replace them with regular marshmallows, the bars may become too soft and fall apart. A quick tip: chill the marshmallows for 10 minutes before use to control the melting rate and avoid a sticky mess.
The Unexpected Star
Butter is not just for flavor; it lubricates the mixture, preventing the bars from sticking to the pan and ensuring a glossy finish. The fat content of butter also enriches the overall mouthfeel, giving each bite a silky, luxurious texture. If you skip butter, the bars will feel dry and lack the subtle richness that makes them memorable. For a dairy‑free version, try coconut oil, which provides a similar melt and a faint coconut aroma.
The Final Flourish
Rainbow sprinkles are the pièce de résistance, adding color, crunch, and a playful finish. Their sugary coating creates a delightful contrast with the creamy marshmallow and the crispy cereal. If you’re watching your sugar intake, consider using a sugar‑free version or simply sprinkling a handful of crushed nuts for a nutty crunch. The sprinkles also act as a visual cue, making the bars instantly recognizable as a treat for celebrations.
Everything's prepped? Good. Let's get into the real action…
The Method — Step by Step
- Heat a medium‑sized saucepan over medium heat and add the butter. Let the butter melt fully, watching it bubble and turn a light golden hue. This step is crucial; if the butter isn’t fully melted, the marshmallows won’t bind properly. The aroma of butter should fill the kitchen, signaling that you’re on the right track.
- Add the mini marshmallows to the pot, stirring constantly with a wooden spoon. The marshmallows will start to melt into a translucent, syrupy mixture. Keep the heat moderate to prevent scorching. Once the marshmallows are fully melted, the mixture will thicken slightly and look glossy.
- Remove the pot from the heat and stir in the vanilla extract. The vanilla adds depth and a warm, aromatic note that balances the sweetness. Let the mixture cool for about a minute; this pause allows the vanilla to infuse without losing potency. This is the moment where the bars begin to feel like a gourmet snack.
- Pour the melted marshmallow mixture over the crispy rice cereal in a large mixing bowl. Toss gently with a spatula until all the cereal is coated. The cereal should be evenly coated, but the mixture should still be wet enough to hold together. If it looks too dry, add a splash of milk or a tablespoon of water to rehydrate.
- Let the mixture rest for 30 seconds to allow the cereal to absorb the moisture. This short rest is vital; it ensures the bars will set firmly once pressed. While you wait, gather a sheet of parchment paper and a 9x9 inch baking pan. The parchment will keep the bars from sticking during the pressing stage.
- Transfer the coated cereal onto the parchment paper and spread it evenly. Press firmly with a spatula or the back of a spoon to compact the mixture into a solid slab. The pressure helps the bars set and creates a uniform thickness. This is where the magic happens; the mixture transforms from a wet paste into a solid, sliceable slab.
- Sprinkle the rainbow sprinkles over the top, gently pressing them into the surface so they adhere. The sprinkles should be evenly distributed and slightly embedded in the surface. The colorful coating not only adds visual appeal but also a subtle crunch that complements the bars’ texture. This step turns a simple snack into a festive treat.
- Cover the pan with a clean towel and let the bars set for at least 15 minutes at room temperature. The bars will firm up as the marshmallow binder solidifies. After the set time, cut the slab into bars using a sharp knife. Each bar should hold its shape without breaking apart.
- Arrange the bars on a plate or storage container and refrigerate for an additional 10 minutes to ensure they are fully set. The cold temperature helps the butter solidify, giving the bars a pleasant, slightly crisp edge. Once chilled, the bars are ready to serve or store for later enjoyment.
That's it — you did it. But hold on, I've got a few more tricks that'll take this to another level…
Insider Tricks for Flawless Results
The Temperature Rule Nobody Follows
Many people skip the step of letting the marshmallow mixture cool slightly before adding it to the cereal. Cooling for a minute allows the vanilla to fully integrate and prevents the mixture from becoming too runny. I once tried to skip this and ended up with bars that were too soft and fell apart on the first bite. Keep the mixture at a gentle warmth, not hot, and you’ll get a perfect balance of chew and firmness.
Why Your Nose Knows Best
The scent of melted butter and vanilla is an early indicator of success. If the aroma is too buttery, you may have over‑melted the butter; if it’s too sweet, you might have added too much marshmallow. Trust your nose to gauge the right point before you add the cereal. A well‑balanced aroma ensures a harmonious flavor profile.
The 5‑Minute Rest That Changes Everything
After pouring the mixture over the cereal, let it sit for exactly five minutes before pressing. This brief rest allows the cereal to absorb the moisture fully, creating a cohesive slab. Skipping this step can leave the bars uneven and crumbly. I swear by the 5‑minute rule; it’s the secret to that perfect bite.
Using a Parchment Paper Trick
Pressing the mixture onto parchment paper instead of a greased pan eliminates the need to peel the bars afterward. The parchment also helps the bars set evenly, preventing them from sticking to the pan and making cutting a breeze. If you’re in a hurry, you can use a silicone baking mat as an alternative.
Refrigeration is Key
Even after the bars have set at room temperature, a quick chill in the fridge locks in the butter’s firmness and enhances the crunch. I’ve found that bars kept in the fridge for 30 minutes before serving taste fresher and have a better texture. If you’re storing them for later, keep them in an airtight container to preserve their crispness.
Adding a Touch of Salt
A pinch of salt at the end of the mixing process balances the sweetness and brings out the flavors of the vanilla and marshmallows. Salt is a flavor enhancer, and even a small amount can elevate the overall taste. I’ve experimented with sea salt flakes, and they add a subtle crunch that pairs beautifully with the sprinkles.
Creative Twists and Variations
Nutty Crunch Edition
Swap out the rainbow sprinkles for a handful of chopped almonds or pecans. The nuts add a satisfying crunch and a buttery flavor that pairs beautifully with the marshmallow base. This variation is perfect for those who want a slightly more sophisticated snack.
Chocolate‑Covered Delight
After cutting the bars, dip the tops in melted dark chocolate and let them set on parchment. The chocolate adds a rich, bittersweet contrast to the sweet marshmallow. This version feels like a decadent dessert that’s still kid‑friendly.
Spiced Surprise
Incorporate a pinch of cinnamon or nutmeg into the marshmallow mixture for a warm, aromatic twist. The spices elevate the flavor profile and make the bars feel like a cozy fall treat. This variation works wonderfully during the cooler months.
Vegan Vibes
Use coconut oil instead of butter and opt for vegan marshmallows. The coconut flavor adds a tropical twist that’s refreshing and light. This version keeps the same texture while being plant‑based.
Low‑Sugar Alternative
Replace the marshmallows with a sugar‑free marshmallow alternative or reduce the amount by half. Pair the bars with a drizzle of honey or a sprinkle of cinnamon sugar afterward. This keeps the bars sweet but cuts down on added sugars.
Seasonal Fruit Boost
Fold in dried cranberries or chopped dried apricots for a burst of natural sweetness and chewy texture. The fruit adds a pop of color and a subtle tartness that balances the sweetness. This variation is ideal for holiday parties.
Storing and Bringing It Back to Life
Fridge Storage
Place the bars in an airtight container or zip‑lock bag and store them in the refrigerator for up to a week. The cold environment keeps the butter firm, preserving the bars’ crisp edges. When you’re ready to eat, let them sit at room temperature for a few minutes to soften slightly.
Freezer Friendly
Wrap each bar individually in plastic wrap before placing them in a freezer bag. They’ll stay fresh for up to three months. When you want to enjoy them, thaw at room temperature for 30 minutes. The bars retain their texture and flavor after freezing.
Best Reheating Method
To revive the bars, place them on a parchment‑lined tray and warm them in a preheated 300°F oven for 5 minutes. The heat will melt the butter just enough to restore a glossy finish without making them soggy. Add a tiny splash of water before reheating if the bars feel too dry; the water steams them back to perfection.
Now that you know how to store and reheat them, you can keep a stash ready for any snack craving that hits at any hour.