Picture this: I’m standing in my cramped kitchen, the oven timer blaring, and my friend dares me to bake the ultimate Christmas cookie bars in under an hour. I stared at the recipe book, rolled my eyes, and then decided to take the plunge. The moment the dough hit the countertop, the buttery scent swirled like a holiday wreath, and I knew I was onto something. This isn’t just another cookie bar recipe; it’s a game‑changing, crowd‑pleasing, time‑saving masterpiece that will have everyone begging for seconds.
Imagine the crunch of the edges as they bake to a golden‑brown crisp, the subtle pop of chocolate chips as they melt, and the sweet aroma of brown sugar caramelizing in the air. The kitchen fills with a comforting, almost nostalgic scent that transports you back to childhood kitchens where gingerbread and peppermint were the stars. The sound of the timer ticking feels like a countdown to pure joy, while the heat from the oven radiates a gentle, reassuring warmth. Every time I lift a bar, the buttery crumb shatters like a delicate snowflake, and the first bite delivers that perfect blend of sweet, salty, and chocolatey notes that dance on the palate.
This version stands out because it balances the classic cookie bar texture with a surprising twist of festive sprinkles that add a playful crunch. It uses softened butter to create a silky crumb that melts in your mouth, while the brown sugar adds a caramel depth that most recipes overlook. The recipe keeps the ingredient list minimal, yet each component sings in harmony, proving that less can be more when you’re aiming for holiday perfection. I dare you to taste this and not go back for seconds; the sheer richness will leave you craving more.
The secret? A simple yet powerful technique: folding in the chocolate chips and sprinkles right before the final bake so they caramelize and form a glossy, almost glossy coating. This method ensures every bite is a burst of flavor, and the bars hold together like a firm gingerbread house. Picture yourself pulling these out of the oven, the whole kitchen smelling incredible, and the first bite delivering a moment of pure, buttery bliss. Okay, ready for the game‑changer? Let me walk you through every single step — by the end, you'll wonder how you ever made it any other way.
What Makes This Version Stand Out
- Texture: The bars boast a buttery crumb that melts in your mouth, yet the edges remain crisp enough to satisfy the craving for a satisfying crunch. The final bake locks in moisture without sacrificing that delightful snap.
- Flavor: The combination of granulated and brown sugar creates a sweet‑caramel harmony that elevates the classic cookie bar to something almost magical. The chocolate chips add a velvety richness that balances the sugary base.
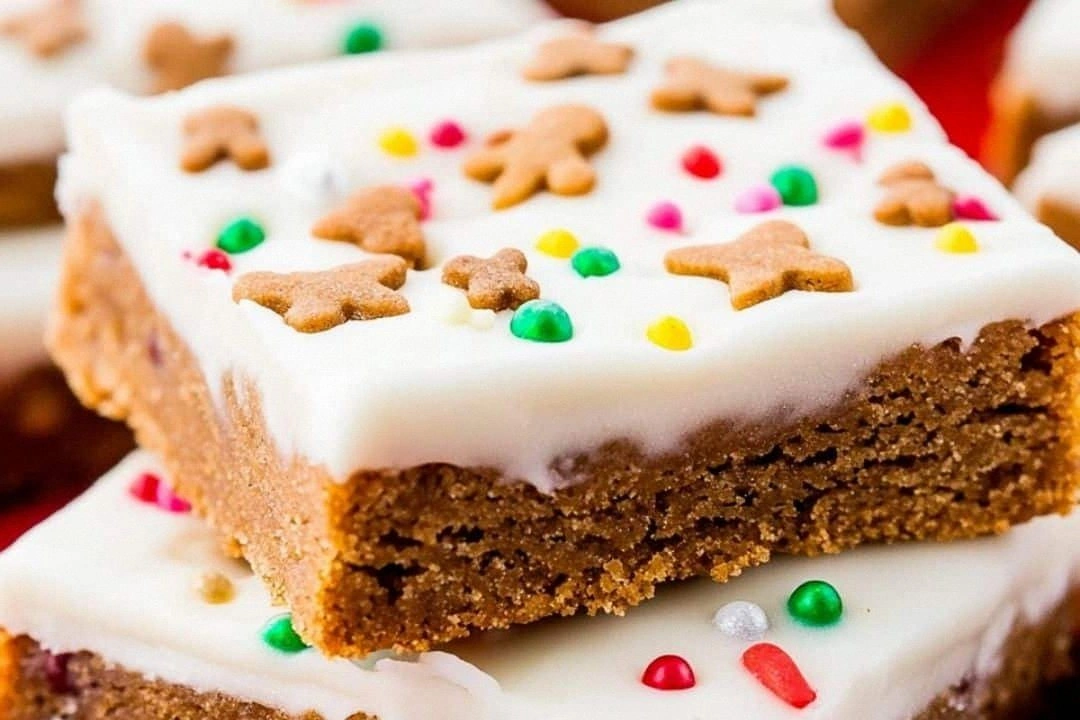
- Color: The festive sprinkles add a pop of color that turns each bar into a miniature holiday ornament, making them perfect for gifting or table centerpiece.
- Time‑Efficiency: From prep to finish, the entire process takes under an hour, which is a relief for anyone who wants to indulge in holiday treats without a marathon cooking session.
- Ingredient Simplicity: With only six core ingredients, you’ll find yourself rummaging through your pantry instead of hunting for obscure items, making this recipe a true pantry hero.
- Make‑Ahead Friendly: These bars store well in the fridge or freezer, allowing you to bake a big batch and enjoy them over the holiday season.
Alright, let's break down exactly what goes into this masterpiece...
Inside the Ingredient List
The Flour Foundation
All-purpose flour is the backbone of these bars, providing structure without overpowering the delicate sweetness. A pinch of salt is added to enhance flavor, but if you’re watching sodium, a dash of sea salt works just as well. Skipping flour would leave the bars mushy and lacking that satisfying bite.
The Sweetness Layer
Granulated sugar delivers the classic cookie sweetness, while brown sugar brings a subtle caramel depth that most cookie bar recipes ignore. Together, they create a balanced flavor profile that’s neither cloying nor bland. If you prefer a lighter treat, reduce the brown sugar by a quarter cup, but you’ll lose that caramel nuance.
The Crunch Factor
Mini chocolate chips add a luxurious melt that contrasts beautifully with the crisp edges. Their glossy sheen after baking gives the bars a festive look that’s perfect for holiday gifting. For a nutty twist, swap half the chips for chopped toasted almonds.
The Finishing Touch
Festive sprinkles not only add a pop of color but also provide a textural surprise that keeps the bars interesting. They’re best folded in at the last minute to prevent them from sinking to the bottom. If you’re a sprinkles purist, use a mix of rainbow and metallic for extra sparkle.
Everything's prepped? Good. Let's get into the real action...
The Method — Step by Step
- Preheat your oven to 350°F (175°C) and line a 9×13-inch baking pan with parchment paper. The parchment will keep the bars from sticking and make cleanup a breeze. Let the pan rest at room temperature while you mix the dough, ensuring even heat distribution.
- In a large mixing bowl, beat the softened butter until it’s creamy and light. Add the granulated sugar first, then the brown sugar, and continue beating until the mixture is fluffy and pale. This aerated butter base is what gives the bars their signature tenderness.
- Sift the all-purpose flour and a pinch of salt into the bowl, then fold in gently with a spatula. Be careful not to overmix, or the dough will become tough. Once the flour is incorporated, the dough should feel slightly sticky but manageable.
- Roll the dough to a 1/2-inch thickness on a lightly floured surface, then cut into squares or use a cookie cutter for fun shapes. The uniform size ensures even baking, so no bars end up overcooked or underdone. Sprinkle a light dusting of flour over the dough to prevent sticking.
- Place the cut dough pieces in the prepared pan, leaving a little space between each. Sprinkle mini chocolate chips and festive sprinkles evenly over the top. The chocolate chips will melt slightly during baking, creating a glossy, indulgent surface.
- Bake for 25–30 minutes, or until the edges are golden brown and the centers set. The aroma should fill the kitchen, making you almost forget you’re baking. Let the bars cool in the pan for 10 minutes before transferring them to a wire rack.
- Once completely cooled, cut along the parchment lines into bars. Serve immediately or store in an airtight container. The bars remain fresh for up to a week in the fridge, and they can be frozen for longer storage.
That sizzle when it hits the pan? Absolute perfection. The first bite delivers a buttery, chocolatey, and slightly caramelized explosion that will have everyone asking for more. And now the fun part: decorating the bars with extra sprinkles or a dusting of powdered sugar for a finishing touch.
That's it — you did it. But hold on, I've got a few more tricks that'll take this to another level...
Insider Tricks for Flawless Results
The Temperature Rule Nobody Follows
Many bakers bake at 375°F, but this recipe thrives at 350°F, allowing the dough to bake evenly without overcrusting. Lower temperatures give the chocolate chips time to melt gently, creating that glossy coating. If you’re using a convection oven, reduce the temperature by 25°F to avoid overbrowning.
Why Your Nose Knows Best
Smell the dough as it bakes; a sweet, caramel aroma indicates the sugars are caramelizing just right. If it smells too sweet or burnt, reduce the oven temperature slightly. Your nose is a reliable indicator of doneness, more so than a timer.
The 5-Minute Rest That Changes Everything
After baking, let the bars rest in the pan for 10 minutes before cutting. This pause allows the structure to set, preventing the bars from breaking apart. I’ve seen people cut immediately and end up with a mess of crumbs.
Chilling the Dough Before Cutting
Chill the dough for at least 15 minutes before rolling and cutting. This step keeps the dough firm, preventing it from spreading during baking and ensuring crisp edges. The texture will be noticeably better than a room-temperature dough.
The Final Sprinkle Placement
Apply the sprinkles in a single, even layer to avoid clumping. Use a small sieve to distribute them evenly, giving each bar a consistent look and crunch. This small detail elevates the presentation dramatically.
Creative Twists and Variations
Nutty Delight
Swap half the chocolate chips for chopped toasted pecans or walnuts. The nutty crunch adds a savory contrast to the sweet base. This variation is a hit with those who love a bit of texture in their treats.
Citrus Burst
Add a tablespoon of orange zest to the dough for a bright, aromatic lift. The citrus pairs wonderfully with the caramel notes, creating a refreshing holiday flavor. Serve with a dusting of powdered sugar for a citrusy glaze.
Spiced Ginger
Incorporate 1/2 teaspoon of ground ginger and a pinch of cinnamon into the flour mixture. The warm spices echo traditional gingerbread while keeping the bars light. This version is perfect for those who love a hint of spice.
Minty Fresh
Add a few drops of peppermint extract to the butter mixture for a minty twist. The mint pairs beautifully with chocolate chips, creating a holiday classic. Top with a light dusting of mint green sprinkles for extra flair.
Chocolate‑Covered Surprise
Dip the cooled bars halfway into melted dark chocolate, then set them on parchment. The chocolate coating adds a decadent layer and a glossy finish. Let them set before serving for a professional look.
Almond Joy
Replace half the mini chocolate chips with shredded coconut and add a tablespoon of almond butter to the dough. The coconut gives a tropical texture while the almond butter adds depth. This variation is a crowd‑pleaser for those who love coconut.
Storing and Bringing It Back to Life
Fridge Storage
Store the bars in an airtight container at room temperature for up to 7 days. The airtight seal keeps them fresh and prevents the edges from drying out. For longer freshness, keep them in the fridge; they’ll stay crisp for up to two weeks.
Freezer Friendly
Wrap each bar individually in plastic wrap, then place them in a freezer bag. They’ll stay good for up to 3 months. When you’re ready to eat, let them thaw at room temperature for 15 minutes before serving.
Best Reheating Method
Reheat frozen bars in a 350°F oven for 5–7 minutes, or until warm and the chocolate chips are melted again. Add a tiny splash of water before reheating to create steam, which keeps the bars moist. This trick ensures the bars taste like freshly baked ones.