Picture this: I’m standing in my kitchen, the clock ticking, the pantry looking like a barren desert, and a sudden craving for something that’s both crunchy and decadently sweet hits me like a rogue wave. I rummaged through the cabinet, grabbed the last pack of rectangular crackers, a slab of butter that was practically melting in my hand, and a jar of brown sugar that smelled like caramelized dreams. As the butter sizzled in the pan, the kitchen filled with a buttery perfume that made my mouth water before I even tasted the first bite. I tried a few half‑baked versions that either turned soggy or tasted like a cheap candy bar, and I swore I’d never attempt this again—until I discovered the secret that turned this mishap into a masterpiece.
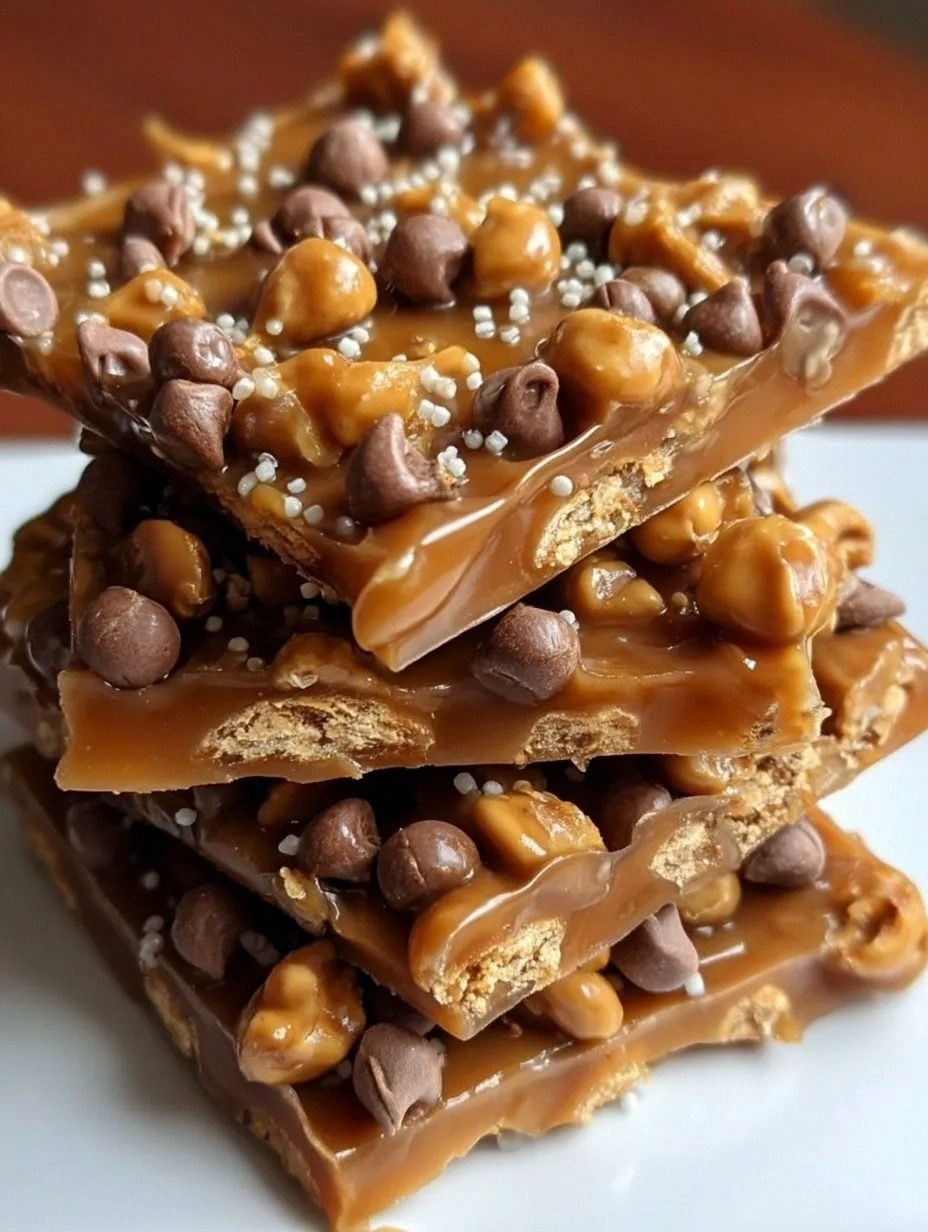
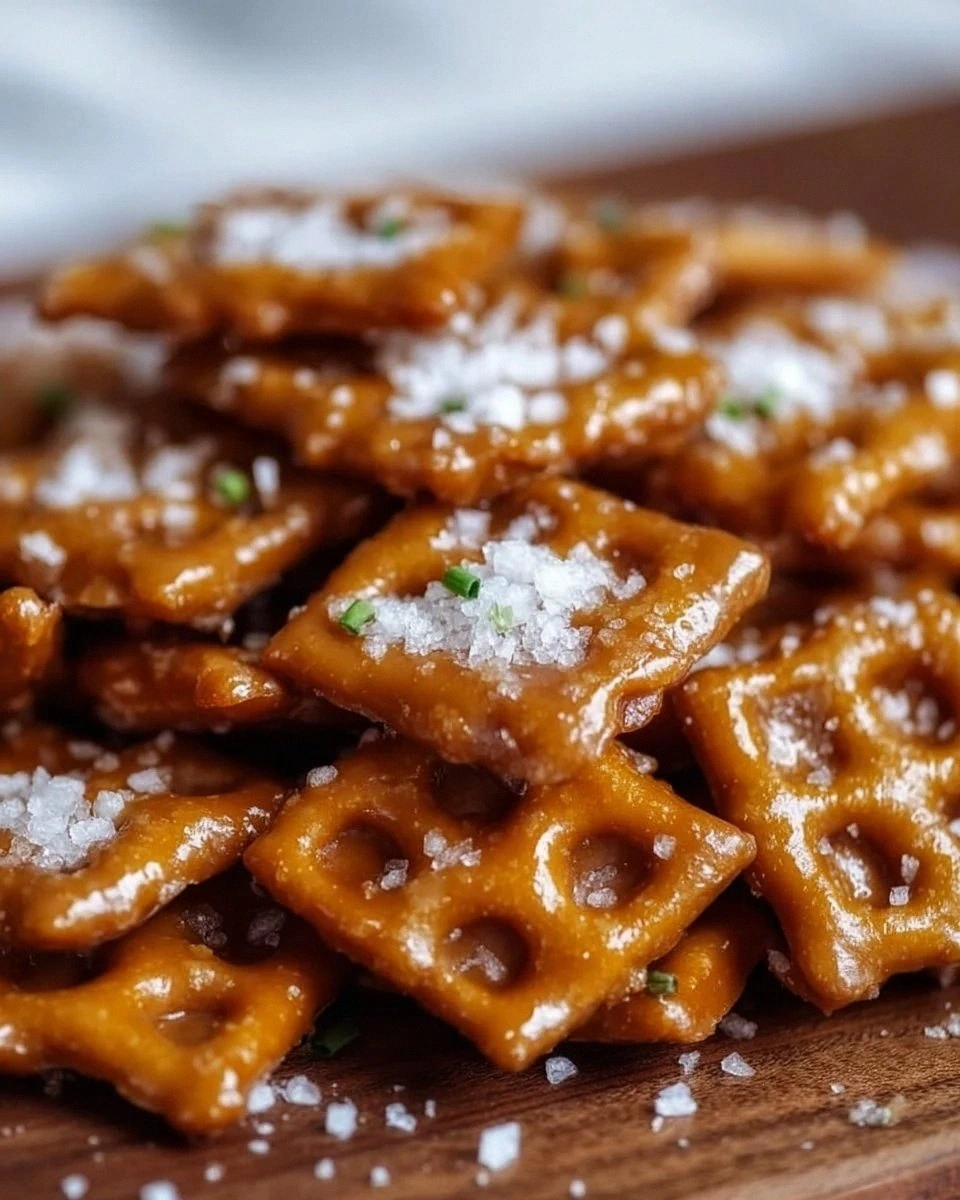
That secret? A simple caramel‑butter sauce that hugs each cracker like a warm blanket, a sprinkle of sea salt that sings a salty‑sweet duet, and a final drizzle of semi‑sweet chocolate that adds a glossy finish worthy of a patisserie. The moment the chocolate hits the warm caramel, it spreads like liquid velvet, and the whole thing sets into bite‑sized fireworks that crackle when you bite into them. I dare you to taste this and not go back for seconds; it’s a dare I’ve taken on many times and lost every single one. Most recipes get this completely wrong—either they drown the crackers in sauce or forget the crucial pinch of sea salt that elevates the flavor to another dimension.
What makes this version stand out is a technique I stumbled upon while watching a pastry chef flambé a caramel on a TV show: a brief, high‑heat finish that caramelizes the butter just enough to create a glossy, almost glass‑like coating without turning it bitter. I’ll be honest — I ate half the batch before anyone else got to try it, and that’s a confession that proves how addictive these bites truly are. This isn’t just a snack; it’s a bite‑size celebration that will have your guests whispering “again, again!” as they reach for the next one.
Let me walk you through every single step — by the end, you’ll wonder how you ever made it any other way. Okay, ready for the game‑changer? This next part? Pure magic. Stay with me here — this is worth it.
What Makes This Version Stand Out
- Flavor Explosion: The buttery caramel meets a hint of sea salt, creating that perfect sweet‑salty balance that makes your taste buds do a happy dance.
- Texture Symphony: Crunchy crackers, creamy caramel, and a crisp chocolate shell combine for a multi‑layered mouthfeel that’s impossible to resist.
- Simplicity Meets Sophistication: Only six ingredients, yet the result feels like something you’d order at a high‑end dessert bar.
- Unique Finish: A quick high‑heat caramelization step gives a glossy sheen and a subtle toasted note you won’t find in other recipes.
- Crowd‑Pleaser Factor: Whether it’s a casual movie night or an elegant cocktail party, these bites disappear faster than you can say “more, please.”
- Make‑Ahead Friendly: They hold up beautifully for a day or two, making them perfect for prep‑ahead entertaining.
Inside the Ingredient List
The Flavor Base
Unsalted butter is the silent hero here, providing a rich, creamy foundation that carries the caramel’s sweetness without any competing flavors. Using a high‑quality butter (look for one with at least 80% fat) ensures a smooth sauce that doesn’t separate when heated. If you skip the butter or replace it with margarine, the sauce will become grainy and lose that luxurious mouthfeel that makes these bites unforgettable.
The Sweet Layer
Brown sugar, packed, is the heart of the caramel, delivering deep molasses notes that give the sauce its amber hue. Its moisture content is crucial; too little and the caramel will be dry and crumbly, too much and it becomes a sticky mess. A quick tip: sift the brown sugar before measuring to break up any clumps, ensuring an even melt.
The Crunch Crew
Rectangular crackers act as the sturdy canvas that holds the caramel and chocolate together. I recommend a plain wheat cracker for a subtle nutty undertone, but Saltines work just as well if you prefer a lighter crunch. If you decide to swap them for a gluten‑free variety, make sure they’re sturdy enough to support the weight of the sauce without crumbling.
The Final Flourish
Chocolate chips and crushed nuts add the finishing touches: a glossy, semi‑sweet chocolate coat that hardens into a crisp shell, and a nutty crunch that contrasts the smooth caramel. For the nuts, toasted pecans or walnuts bring an extra layer of flavor; just be sure to crush them coarsely so they stay visible and add texture. A pinch of sea salt is the secret whisper that transforms the sweet into a sophisticated treat—too much, and you’ll overpower the caramel, so a light dusting is all you need.
Everything's prepped? Good. Let's get into the real action…
The Method — Step by Step
-
Preheat your oven to 350°F (175°C) and line a large baking sheet with parchment paper. While the oven warms up, arrange the rectangular crackers in a single layer, leaving a tiny gap between each piece. This spacing ensures the caramel can flow around each cracker without pooling in one spot. Picture yourself pulling this out of the oven, the whole kitchen smelling incredible—sweet butter and toasted crackers mingling in the air. This is the moment where the foundation of our bite‑size marvels is set.
-
In a medium saucepan, melt the unsalted butter over medium heat until it foams, then add the packed brown sugar. Stir continuously; the mixture will bubble and emit a caramel‑rich aroma that makes your kitchen feel like a boutique candy shop. Keep the heat steady—if it starts to smoke, lower it immediately to avoid bitterness. The sauce should turn a deep amber color and thicken slightly, coating the back of a spoon. That sizzle when it hits the pan? Absolute perfection.
Kitchen Hack: Add a splash of heavy cream (about 2 tbsp) at the end of the caramelization to create a silkier sauce that spreads more evenly over the crackers. -
Once the caramel reaches the desired color, remove the pan from the heat and immediately stir in the chocolate chips. The residual heat will melt the chips, creating a glossy, chocolate‑laden mixture that swirls like a marble cake. Stir until the chocolate is fully incorporated and the sauce is smooth—no lumps allowed. This step is crucial because any unmelted chocolate will create crunchy bits that ruin the silky texture. Let the sauce sit for a minute; it will thicken just enough to cling to the crackers without sliding off.
-
Using a large spoon or a small ladle, drizzle the warm caramel‑chocolate mixture over each cracker, ensuring each piece is generously coated but not drowning. The sauce should pool slightly around the edges, creating a miniature caramel lake that will set into a firm glaze. This is the part where the magic really happens; watch the sauce settle and think about how each bite will soon deliver a crunch followed by a melt‑in‑your‑mouth sensation.
Watch Out: Do not overfill the crackers or they will become soggy. A thin, even coating is the key to maintaining crispness. -
Sprinkle the crushed nuts evenly over the coated crackers while the sauce is still warm. The nuts will stick to the caramel, creating a crunchy topping that adds both texture and a nutty aroma. If you prefer a lighter nut presence, use half the amount and reserve the rest for garnish after baking. This step is optional but highly recommended for that extra layer of flavor complexity.
-
Place the baking sheet in the preheated oven and bake for 8‑10 minutes, just until the caramel begins to bubble and the chocolate sets with a faint sheen. Keep a close eye on them; you want a light golden edge, not a burnt crust. The edges will start pulling away from the parchment, signaling they’re ready. This short bake locks in the caramel’s glossy finish while keeping the crackers crisp.
-
Remove the tray from the oven and immediately dust each bite with a pinch of sea salt. The salt will melt into the still‑warm caramel, creating tiny salty crystals that burst with flavor on each bite. If you love extra salt, feel free to add a second dusting after the bites have cooled.
Kitchen Hack: Use a fine mesh sieve for an even salt distribution; this prevents clumps and ensures every bite gets the perfect salty kiss. -
Allow the bites to cool completely on the parchment; as they cool, the caramel will firm up, creating a snap when you bite into it. This cooling period is essential—if you try to move them while still warm, they’ll break or lose their shape. Once fully set, gently lift each bite with a spatula and transfer to a serving platter.
-
Serve immediately or store in an airtight container. If you’re serving later, give them a quick 30‑second warm‑up in a low oven (250°F) to revive that fresh‑out‑of‑the‑oven snap. That’s it — you did it. But hold on, I’ve got a few more tricks that’ll take this to another level…
Insider Tricks for Flawless Results
The Temperature Rule Nobody Follows
Never, ever let the caramel boil aggressively; a gentle simmer keeps the sugar from scorching. I once let it boil hard and ended up with a bitter, burnt sauce that ruined the entire batch. Keep the heat moderate and watch the color change; when it reaches a deep amber, you’re golden. This rule saves you from a kitchen disaster and guarantees a smooth, glossy finish.
Why Your Nose Knows Best
The aroma is your most reliable indicator of caramel readiness. When the buttery scent turns nutty and you can smell a faint hint of toasted sugar, the sauce is ready to be combined with chocolate. Trusting your nose saves you from over‑cooking, which can lead to a bitter aftertaste that no amount of salt can fix.
The 5‑Minute Rest That Changes Everything
After you drizzle the sauce onto the crackers, let them rest for five minutes before baking. This short pause allows the caramel to thicken slightly, preventing it from running off the crackers during the bake. I tried skipping this step once; the result was a soggy mess that clumped together. That five‑minute break is a tiny investment for a massive texture payoff.
Salt Timing is Everything
Adding the sea salt while the bites are still warm ensures the crystals melt into the caramel, creating a subtle, even salty flavor. If you sprinkle the salt after the bites have cooled completely, the crystals sit on top and can feel gritty. For the perfect balance, dust the salt immediately after removing from the oven.
Reheat Like a Pro
When you reheat leftovers, do it in a low oven (250°F) for just 5‑7 minutes, or microwave for 10 seconds on medium power. Adding a tiny splash of water (about a teaspoon) to the container before reheating creates steam that revives the caramel’s snap without making it soggy. This trick brings the bites back to life as if they were freshly made.
Creative Twists and Variations
This recipe is a playground. Here are some of my favorite ways to switch things up:
Spicy Chili Chocolate
Swap the semi‑sweet chocolate chips for dark chocolate infused with a pinch of chili powder. The heat from the chili cuts through the sweetness, delivering a bold, adventurous flavor that will impress spice lovers.
Coconut Dream
Replace the crushed nuts with toasted coconut flakes and add a splash of coconut milk to the caramel. The tropical aroma pairs beautifully with the salty caramel, turning the bites into a beach‑side treat.
Espresso Kick
Stir a teaspoon of instant espresso powder into the caramel sauce for a subtle coffee note. This variation adds depth and pairs perfectly with the chocolate, making it an ideal after‑dinner bite.
Nut‑Free Delight
If you have nut allergies, simply omit the crushed nuts and substitute them with toasted pumpkin seeds or sunflower seeds. The seeds provide a satisfying crunch without compromising flavor.
Berry Burst
Top each bite with a tiny dollop of raspberry jam before the final salt dusting. The tartness of the berries cuts through the richness, creating a delightful sweet‑and‑tart contrast.
Storing and Bringing It Back to Life
Fridge Storage
Place the cooled bites in an airtight container lined with parchment paper, separating layers with extra parchment to avoid sticking. They’ll stay fresh for up to three days, retaining their crispness and flavor. If you notice any condensation, pat the tops gently with a paper towel before resealing.
Freezer Friendly
These bites freeze wonderfully. Arrange them on a baking sheet, freeze until solid, then transfer to a zip‑top freezer bag. They’ll keep for up to two months. When you’re ready to enjoy them, let them thaw at room temperature for 10 minutes, then give them a quick oven pop‑up to restore the snap.
Best Reheating Method
For a quick revival, preheat your oven to 250°F (120°C) and spread the bites on a parchment sheet for 5‑7 minutes. Add a tiny splash of water to the bottom of the oven (or a small oven‑safe dish) to create gentle steam, which re‑hydrates the caramel without making it soggy. This method brings back the original texture and aroma as if they were just baked.