I remember the night my kitchen turned into a smoky battlefield. I had been experimenting with a handful of dried chilies, thinking I could whip up a quick “Mexican‑style” stew in fifteen minutes. The pot exploded, the onions burned, and I was left with a charred mess that smelled like burnt toast and regret. I stared at the charred lid, and that moment sparked a fierce determination: I would create a chili that would make every kitchen disaster worth the effort.
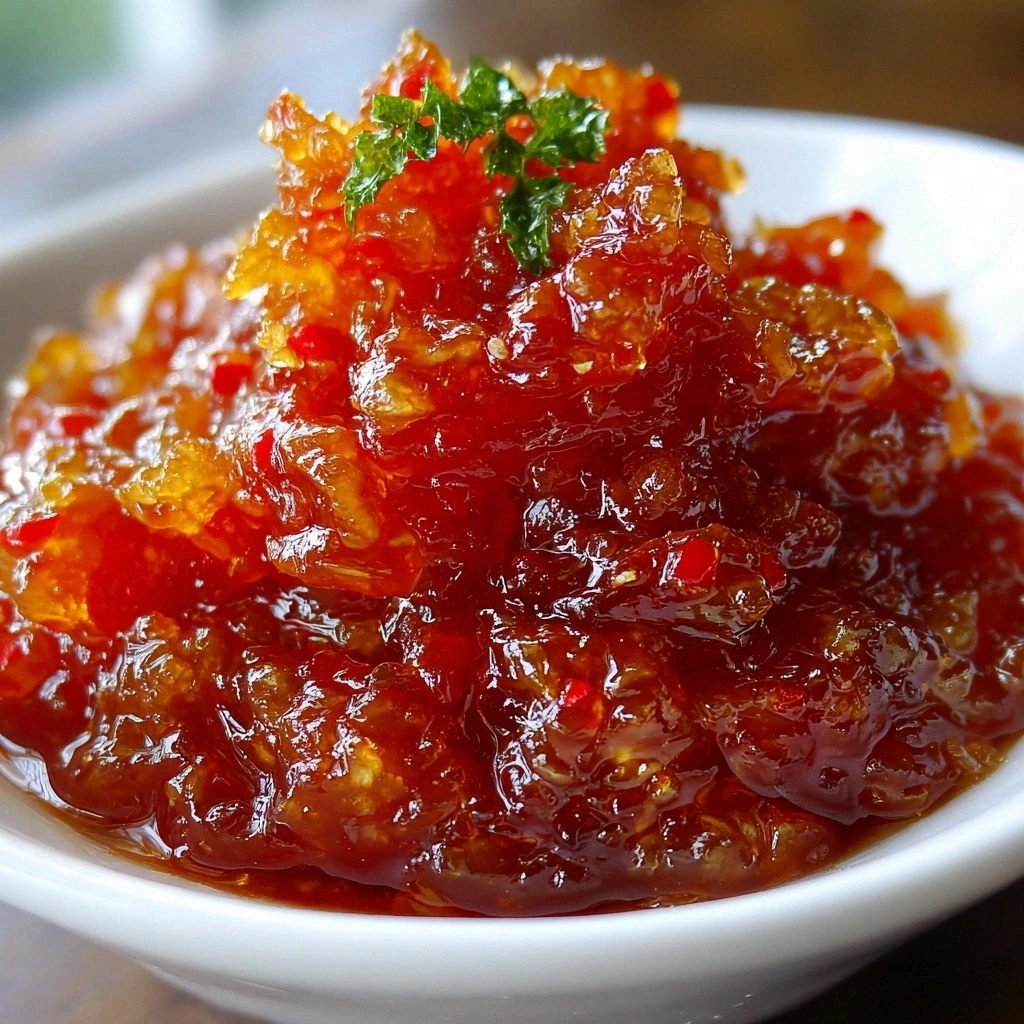
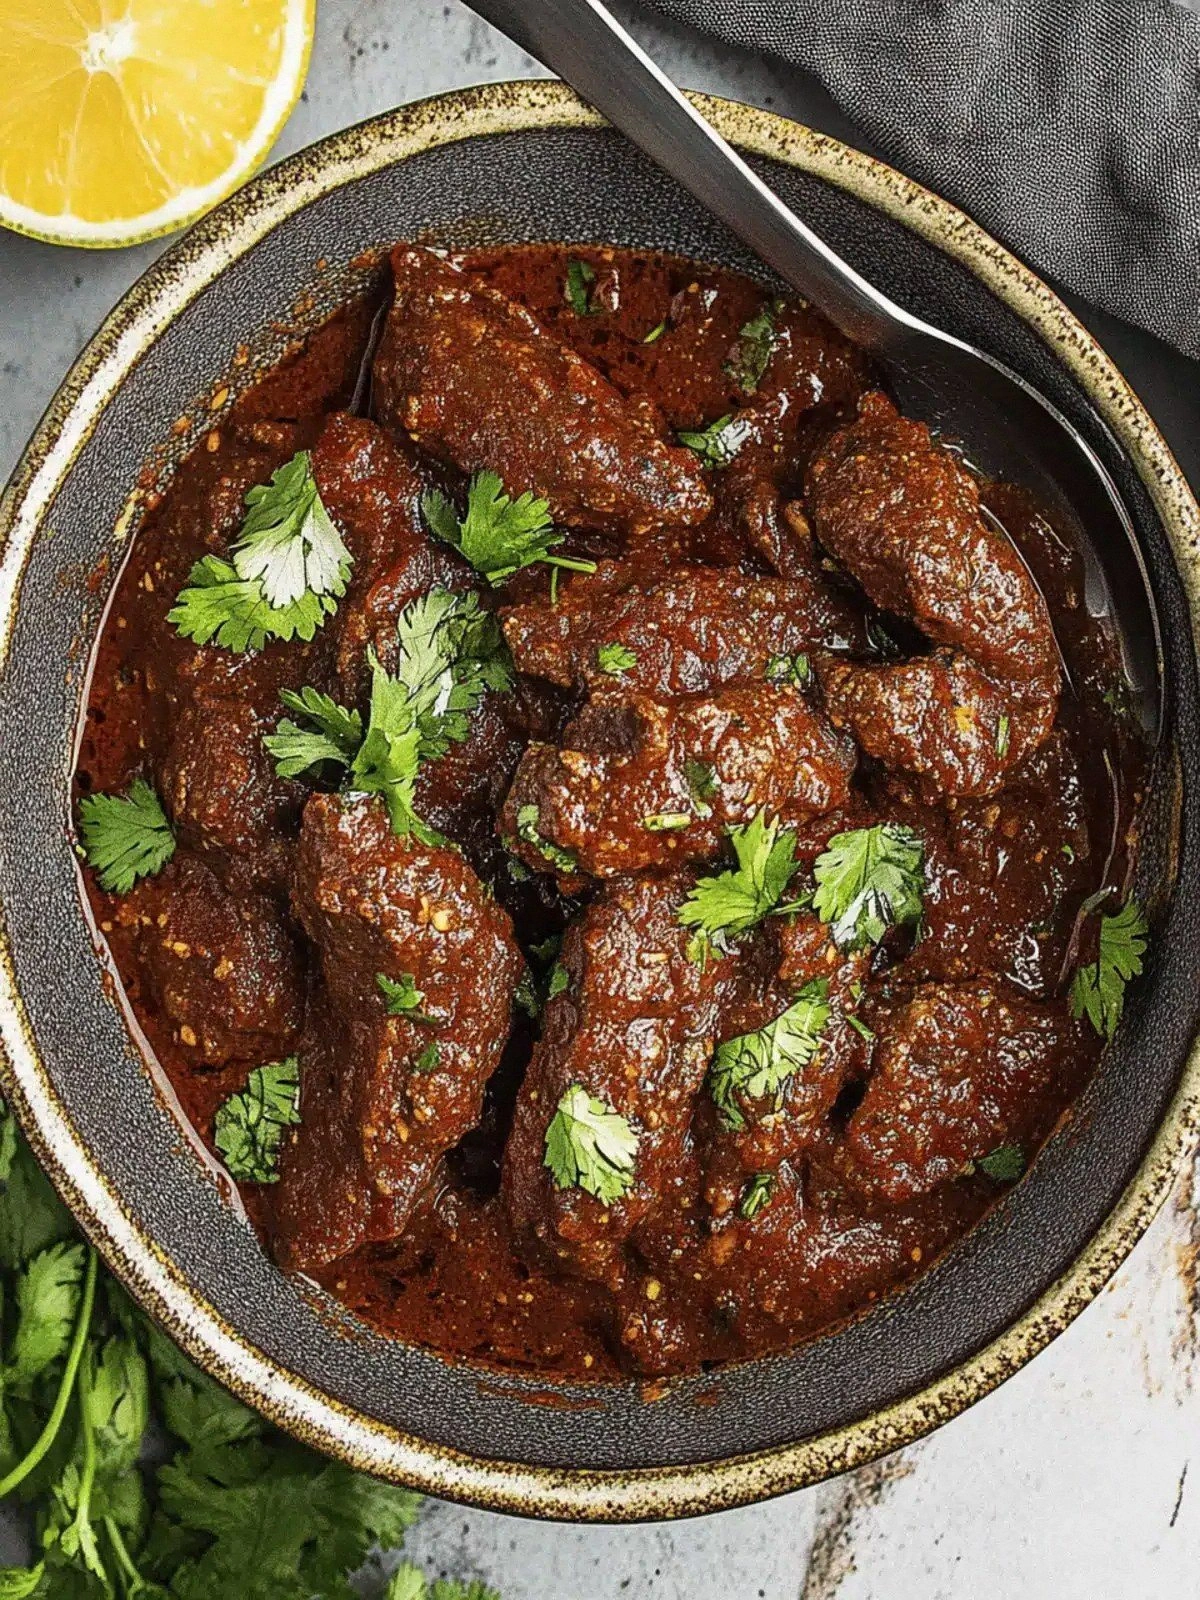
The first time I tasted this chili, the heat was a gentle, rolling wave, not a sudden blaze. The aroma was a deep, earthy symphony of smoky ancho, peppery guajillo, and the subtle sweetness of dried pasilla. The texture was a velvety blend of tender beef and silky broth, with a faint crunch from the fresh jalapeños. The sound of the simmering pot was like a comforting lullaby, and the sight of the thick, glossy sauce settling into the bowl felt like a promise of comfort. Every bite carried a layered flavor that danced on the tongue, leaving a lingering warmth that made my cheeks flush.
What sets this version apart from every other chili recipe I’ve tried is the deliberate balance between heat, depth, and the unexpected umami punch from the dried chilies. Instead of relying on canned tomatoes or instant broth, I slow‑cook the beef until it practically melts in your mouth, then deglaze with a splash of beer for added complexity. The result is a sauce that clings to each grain of rice or spoonful of beans like a velvet blanket, yet still allows the beef to stand out as the hero. It’s the kind of dish that makes people say, “I dare you to taste this and not go back for seconds.”
If you’ve ever felt that your chili is either too thin or too dry, this recipe will change the game. Picture yourself pulling this out of the slow cooker, the entire kitchen smelling incredible, and everyone’s eyes lighting up at the first bite. I promise you: by the end, you’ll wonder how you ever made it any other way. Let me walk you through every single step — by the end, you’ll wonder how you ever made it any other way.
What Makes This Version Stand Out
- Heat Precision: The combination of ancho, guajillo, pasilla, and chiles de árbol delivers a layered heat that rises gradually, unlike the one‑shot burn of typical chili. Each chili brings its own character, creating a symphony rather than a solo.
- Umami Depth: Slow‑cooking the beef in a rich broth infused with beer and dried chilies turns the meat into a flavor powerhouse that’s more satisfying than any canned‑tuna or instant broth.
- Texture Contrast: The beef is rendered to a silky softness, while the fresh jalapeños provide a bright, slightly crisp bite that keeps the dish from becoming a mush.
- Simplicity of Ingredients: Despite its complexity of flavor, the recipe only uses thirteen ingredients, all of which you can find in a regular grocery store.
- Make‑Ahead Friendly: The chili tastes even better the next day, making it a perfect week‑night dinner or a hearty lunch for the following day.
- Crowd‑Pleaser: The balanced heat and deep flavor make it a hit at family gatherings, potlucks, and dinner parties alike.
- Versatility: You can serve it over rice, with tortillas, or even as a topping for baked potatoes or nachos.
Alright, let's break down exactly what goes into this masterpiece...
Inside the Ingredient List
The Flavor Base
The dried chilies are the backbone of this chili, each contributing a distinct profile. Ancho chilies bring a mild sweetness and a hint of raisin, guajillo chilies add a bright, slightly tart note, and pasilla chilies offer a deep, earthy undertone. Chiles de árbol provide the subtle heat that lingers without overwhelming. Together, they create a layered heat that rises gradually. If you skip the chilies, the dish will lack the complex depth that makes it unforgettable. For a milder version, reduce the chiles de árbol to one piece or replace them with a teaspoon of chipotle powder.
Buying tip: Look for chilies that feel firm and have a slight sheen; avoid those with visible cracks or a mushy texture, as they may have absorbed moisture and lost flavor.
The Texture Crew
The beef chuck roast is the star of the show. It’s a fatty cut that, when slow‑cooked, breaks down into tender, melt‑in‑your‑mouth morsels. The olive oil is used to sear the beef, creating a caramelized crust that locks in juices. The flour is a binding agent that thickens the sauce, giving it a glossy finish. If you skip the flour, the chili will be watery; if you over‑flour, it will become gummy. A good trick is to mix the flour with a splash of cold water before adding it to the pot to prevent lumps.
Swap suggestion: For a gluten‑free version, replace flour with cornstarch or arrowroot powder.
The Unexpected Star
The onion and garlic form the aromatic foundation. They’re sautéed until translucent, releasing their natural sweetness and a subtle bite that balances the heat from the chilies. A pinch of cumin is added for earthiness, while oregano and pepper bring a herbal brightness. If you omit the cumin, the chili will feel flat; if you skip the oregano, it will lack that characteristic Mexican herbal note. A quick tip: Toast the cumin seeds in a dry pan before grinding to amplify their flavor.
Swap suggestion: Replace oregano with thyme or marjoram for a different herbal profile.
The Final Flourish
The beef stock completes the sauce, adding body and moisture. It’s the liquid that binds all the flavors together. The jalapeños add a fresh, bright heat that cuts through the richness. The salt and pepper finish the seasoning, ensuring the chili tastes balanced and not off‑beat. If you skip the stock, the chili will be dry; if you add too much, it will become soupy. A trick is to add the stock gradually, tasting as you go, until you reach the desired consistency.
Swap suggestion: Use vegetable stock for a vegetarian version, but keep the beef for the authentic flavor.
Everything's prepped? Good. Let's get into the real action...
The Method — Step by Step
- Begin by soaking the dried chilies in hot water for 20 minutes until they soften. Drain, remove stems, and blend them into a smooth paste with a splash of water. This paste will carry the heat and flavor deep into the pot. I dare you to taste this and not go back for seconds.
- In a large Dutch oven, heat the olive oil over medium‑high heat. Add the beef chuck, searing on all sides until a dark crust forms. The searing process is crucial; it locks in juices and creates that caramelized flavor that no amount of spices can replace.
- Remove the beef and set aside. In the same pot, add the chopped onion and garlic, sautéing until translucent and fragrant. Then stir in the cumin, oregano, and black pepper, letting the spices toast for 30 seconds. This step is the moment of truth; the aroma should be rich and inviting.
- Return the beef to the pot, add the chili paste, and stir to coat the meat evenly. Pour in the beef stock, ensuring the beef is mostly submerged. Bring the mixture to a gentle simmer, then reduce the heat to low, cover, and let it slow‑cook for 2 ½ hours. The beef should be so tender it practically falls apart.
- After the slow‑cook, stir in the jalapeños and season with salt. Let the chili rest for 10 minutes before serving; this allows the flavors to meld and the heat to settle.
- Before serving, whisk the flour with a splash of cold water to make a slurry. Stir this into the chili to thicken the sauce to your desired consistency. The sauce should coat the spoon like a velvet blanket.
- Serve hot, garnished with chopped cilantro, a squeeze of lime, or a dollop of sour cream. Pair it with rice, tortillas, or a hearty bowl of beans. Enjoy the comforting warmth that will have everyone asking for seconds.
That's it — you did it. But hold on, I've got a few more tricks that'll take this to another level...
Insider Tricks for Flawless Results
The Temperature Rule Nobody Follows
Never let the pot boil vigorously during the slow‑cook. A steady low simmer keeps the meat tender and prevents the sauce from separating. If the liquid starts to evaporate, add a splash of water to maintain the right consistency.
Why Your Nose Knows Best
Smell the chili as it simmers; if it starts to smell too “canned,” it’s time to add fresh herbs. A sudden scent of burnt onions means you’re over‑cooking the onions. Trust your nose as the ultimate flavor guide.
The 5‑Minute Rest That Changes Everything
After you finish cooking, let the chili sit covered for 5 minutes. This short rest allows the flavors to marry, making the chili richer. I’ve seen people skip this step and end up with a dish that feels flat.
The “S” for Sauce Thickness
If the sauce is too thin, whisk a tablespoon of flour with a little cold water and stir it in. The sauce should cling to the back of a spoon, not run off like a waterfall.
The Secret of Fresh Chili Heat
Add the jalapeños toward the end of cooking, not at the start. This preserves their bright heat and prevents them from turning mushy.
Creative Twists and Variations
This recipe is a playground. Here are some of my favorite ways to switch things up:
Cheesy Chili Con Queso
Add a cup of shredded Monterrey Jack in the last 10 minutes, letting it melt into the sauce. Serve over nachos for a gooey, melty experience.
Sweet & Smoky Apple Chili
Stir in a diced apple and a pinch of cinnamon after the slow‑cook. The apple’s sweetness balances the heat, while the cinnamon adds a warm spice.
Vegan Chili Supreme
Replace the beef with cubed seitan or hearty mushrooms. Use vegetable stock and a splash of soy sauce for umami. The result is a plant‑based chili that still satisfies.
Breakfast Chili Bowl
Serve the chili over a poached egg and top with a sprinkle of cheddar. The runny yolk adds a silky texture that turns dinner into a breakfast delight.
Chili with a Citrus Twist
Finish the dish with a squeeze of fresh lime and a sprinkle of chopped cilantro. The citrus brightens the deep flavors and adds a fresh finish.
Storing and Bringing It Back to Life
Fridge Storage
Cool the chili to room temperature, then transfer it to an airtight container. Store in the fridge for up to 4 days. The flavors deepen over time.
Freezer Friendly
Divide the chili into single‑serving portions and freeze in freezer‑safe bags. It will keep for up to 3 months. Thaw overnight in the fridge before reheating.
Best Reheating Method
Reheat the chili on low heat, adding a splash of water or broth to restore moisture. A quick stir and a few minutes of gentle simmering will bring it back to life.