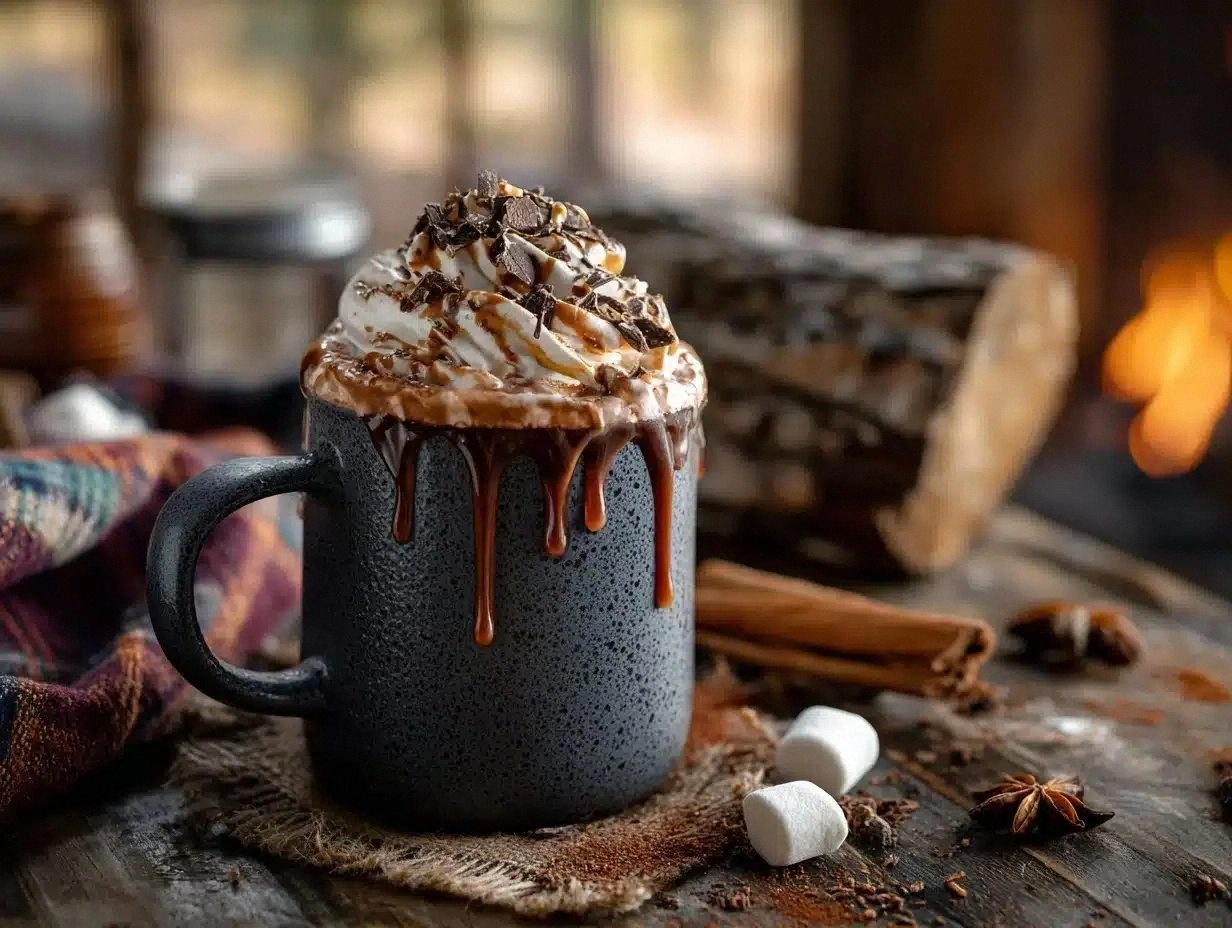
Picture this: I’m standing in my kitchen, the rain drumming against the windows, and a sudden craving for something that screams campfire without actually having to brave the woods. I tried to toast a regular s’more in the microwave, but the chocolate turned into a sad, oily puddle and the marshmallows just melted into a sticky mess. I dared my roommate to a “who can make the best s’mores” showdown, and after a disastrous first round, I vowed to create the ultimate version that would make even the most skeptical sweet tooth swoon. This is the result – a deep‑dish s’mores bowl that captures the smoky, gooey magic of a campfire in a buttery, crisp cookie crust, topped with melty chocolate and a cloud of toasted marshmallows.
The moment you open the oven, a wave of sweet, buttery aroma hits you like a warm hug from an old friend. The scent of caramelized sugar mingles with the earthy notes of graham crackers, while the chocolate releases that familiar, comforting perfume that makes you think of childhood birthday parties. You hear the faint crackle of the marshmallows as they turn golden on the broiler, and you can almost feel the heat radiating from the dish as you pull it out, steam dancing around the edges. The texture? Imagine a cookie crust that’s crisp on the outside, soft and chewy on the inside, cradling a molten river of chocolate that’s studded with fluffy marshmallow islands.
Most s’mores recipes get the balance wrong – they either drown the flavors in too much chocolate, or they leave the crust soggy and bland. This version stands out because I’ve tweaked the cookie base to include a hint of sugar and butter that caramelizes perfectly, added crushed graham crackers for that nostalgic crunch, and used mini marshmallows so every bite is evenly coated in gooey goodness. The secret weapon? A quick broil at the end that gives the marshmallows a toasted, caramelized top without turning them into a rubbery mess. I’ll be honest — I ate half the batch before anyone else got a chance, and I’m still not over it.
Let me walk you through every single step — by the end, you’ll wonder how you ever made s’mores any other way. Okay, ready for the game‑changer? This next part? Pure magic. Stay with me here — this is worth it.
What Makes This Version Stand Out
- Texture: A buttery cookie crust that stays crisp on the edges while remaining tender in the center, creating a perfect contrast to the gooey filling.
- Flavor Depth: The addition of crushed graham crackers infuses the base with a subtle honey‑toasted note that elevates the classic s’mores taste.
- Simplicity: Only five core ingredients are needed, yet each one is treated with a technique that maximizes its potential.
- Visual Appeal: The deep‑dish shape holds the molten chocolate like a tiny volcano, and the toasted marshmallow top looks like a glossy, golden crown.
- Crowd Reaction: I dare you to taste this and not go back for seconds – it’s a guaranteed “wow” moment for any gathering.
- Make‑Ahead Friendly: You can prep the crust and store it, then finish the assembly and broil just before serving.
- Ingredient Quality: Using Hershey’s classic squares ensures that nostalgic chocolate flavor without any bitter aftertaste.
- Season‑Proof: Whether it’s a chilly winter night or a summer backyard party, this dish feels right at home.
Inside the Ingredient List
The Flavor Base
The cookie crust starts with sugar, butter, eggs, and flour – the classic quartet that forms the backbone of any good baked good. Sugar isn’t just for sweetness; it caramelizes during baking, giving the crust that golden, slightly crunchy edge that shatters like thin ice under a spoon. Butter adds richness and helps create that melt‑in‑your‑mouth crumb, while the eggs bind everything together and add a subtle fluffiness that prevents the crust from becoming dense. If you skip any of these, you’ll end up with a flat, flavorless base that can’t hold the molten chocolate.
For the best results, use unsalted butter and let it soften at room temperature for just the right consistency – not too melted, not too hard. If you’re looking for a dairy‑free alternative, try a high‑quality plant‑based butter; it will still give you that buttery flavor, though the texture may be a touch softer.
The Texture Crew
Graham crackers are the unsung heroes of s’mores, providing that distinct honey‑toasted flavor and a crumbly texture that mimics the crunch of a campfire toast. When you crush them finely and fold them into the cookie dough, they distribute their flavor evenly, ensuring every bite has that nostalgic crunch. If you can’t find graham crackers, try digestive biscuits – they’re slightly less sweet but still deliver a wonderful crumbly texture.
Mini marshmallows are chosen over regular sized ones for a reason: they melt uniformly, creating a smooth, airy layer that spreads evenly across the surface. Their smaller size also means you get more surface area for that toasted, caramelized top when you broil. If you only have regular marshmallows, cut them into quarters to mimic the mini size.
The Unexpected Star
Chocolate is the soul of any s’mores, and Hershey’s squares bring a classic, milky richness that melts into a glossy river. The key is to use enough chocolate to coat the bottom of the bowl without drowning the other flavors. If you’re a dark chocolate aficionado, feel free to swap half the milk chocolate for a bittersweet bar – it adds depth without overpowering the sweet marshmallows.
A little tip: grate the chocolate before adding it to the bowl. Grated chocolate melts faster and more evenly, preventing any clumps that could ruin the silky texture. This tiny step makes the difference between a smooth finish and a lumpy disappointment.
The Final Flourish
All the usual suspects for a delicious cookie crust – a pinch of salt, a splash of vanilla extract, and a dash of baking powder – round out the flavor profile. Salt amplifies the sweetness and balances the richness of butter and chocolate, while vanilla adds a subtle aromatic backdrop that makes the whole dish feel more sophisticated. Baking powder is optional but helps the crust rise just enough to stay light. Skip it, and you’ll still get a tasty bowl, but it might be a tad denser.
If you’re looking to make this recipe gluten‑free, substitute the flour with a 1‑to‑1 gluten‑free blend and use gluten‑free graham crackers. The texture will remain just as delightful, and the flavor won’t miss a beat.
Everything's prepped? Good. Let's get into the real action...
The Method — Step by Step
Preheat your oven to 350°F (175°C). While the oven warms up, gather a large mixing bowl and whisk together 2 cups of all‑purpose flour, ½ cup of sugar, and a pinch of salt. The dry mixture should look like fine sand; this is the foundation that will give the crust its delicate crumb. I dare you to taste this raw mixture – it’s already sweet enough to make you smile.
In a separate bowl, cut ½ cup (one stick) of cold butter into small cubes and beat in 2 large eggs until the mixture is smooth and glossy. The butter should still show tiny specks – that’s the secret to a flaky crust. Combine the wet and dry ingredients, gently folding until a cohesive dough forms. If the dough feels too dry, add a tablespoon of cold water; if it’s too sticky, sprinkle a bit more flour.
Now, crush 1 cup of graham crackers into fine crumbs using a food processor or a zip‑top bag and a rolling pin. Fold these crumbs into the dough, ensuring they’re evenly distributed. This step is where the classic s’mores flavor really starts to shine, and the graham crumbs will create little pockets of honeyed crunch throughout the crust.
Place the pan on a baking sheet and bake for 12‑15 minutes, or until the edges turn a light golden brown and you can hear a faint, toasty scent. The crust should be firm enough to hold its shape but still slightly soft in the middle – that’s the sweet spot. Once done, remove from the oven and let it cool for 5 minutes while you prepare the filling.
While the crust is cooling, grate 8 Hershey’s chocolate squares (about 4 ounces) and set aside. Grating ensures the chocolate melts quickly and evenly when you pour it over the warm crust. Then, measure out 1 cup of mini marshmallows and keep them ready for the final topping.
Spread the grated chocolate evenly over the warm crust, allowing it to melt into a glossy layer. The heat from the crust does most of the work, but if you notice any stubborn spots, pop the pan back in the oven for another minute. This is the moment of truth – the chocolate should be smooth, shiny, and just beginning to bubble at the edges.
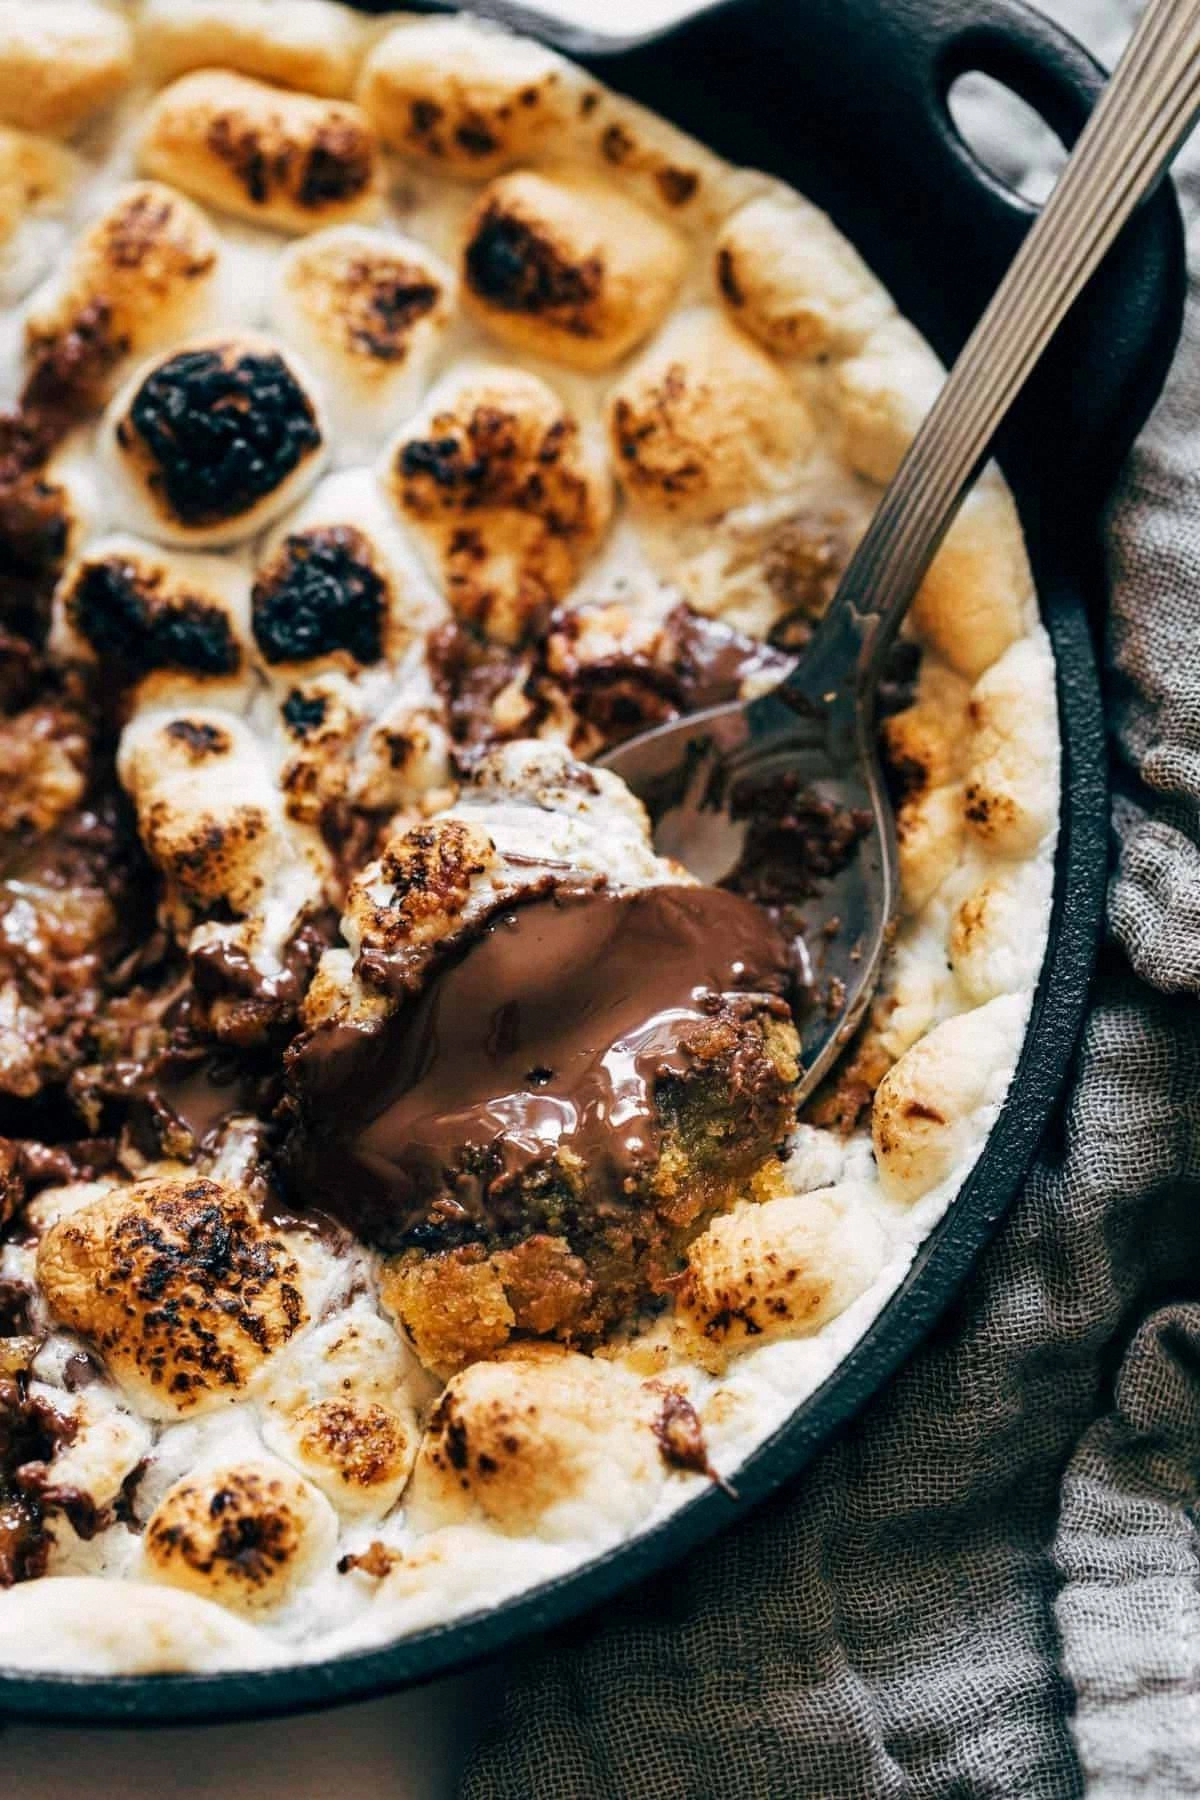
Scatter the mini marshmallows over the melted chocolate, ensuring an even layer that will toast uniformly. Place the pan under the broiler on high heat. Keep a close eye – you’ll hear a faint sizzle and see the marshmallows start to puff and turn golden. In about 30 seconds, they’ll be perfectly toasted, with a glossy, caramelized surface that looks like a tiny sunrise.
Remove the pan from the broiler and let it sit for a minute to let the chocolate set slightly. This short rest prevents the bowl from becoming too runny when you slice into it. Serve warm, cutting the bowl into wedges that reveal a molten chocolate core surrounded by toasted marshmallow clouds. Picture yourself pulling this out of the oven, the whole kitchen smelling incredible… and that’s the feeling you’ll want to capture for your guests.
That’s it — you did it. But hold on, I’ve got a few more tricks that'll take this to another level. Ready for the secret sauce? Stay tuned for the insider tips that will make your s’mores bowls truly unforgettable.
Insider Tricks for Flawless Results
The Temperature Rule Nobody Follows
Most home bakers bake at 350°F, but for this crust I recommend starting at 375°F for the first 5 minutes, then dropping to 325°F for the remainder. The initial high heat creates a rapid rise, giving the edges that coveted crunch, while the lower temperature ensures the interior stays soft and pillowy. I once tried a single‑temperature bake and ended up with a crust that was too dense – lesson learned. Trust the two‑stage approach and you’ll get that perfect contrast every time.
Why Your Nose Knows Best
Don’t rely solely on timers; your nose is a far more reliable indicator of doneness. When the crust begins to emit a nutty, caramel scent, you’re close to the perfect bake. If you smell a faint burnt odor, pull it out immediately – over‑baking ruins the delicate balance. I’ve found that trusting my sense of smell reduces the number of “oops” moments dramatically.
The 5‑Minute Rest That Changes Everything
After the broil, let the bowl rest for exactly five minutes before slicing. This pause allows the chocolate to firm up just enough to hold its shape while the marshmallows settle into a soft, gooey layer. Skipping this step results in a runny mess that slides off the plate. A friend tried to serve it hot straight from the broiler and ended up with chocolate dripping everywhere – not the dramatic effect we want.
Layering Like a Pro
Instead of dumping all the chocolate at once, spread it in two thin layers, allowing the first to set slightly before adding the second. This creates a glossy, multi‑dimensional finish that catches the light beautifully. It also prevents the marshmallows from sinking into a single thick pool of chocolate, keeping each bite balanced.
Tool Time: The Right Spoon
Use a silicone spatula with a flat edge to smooth the chocolate. Metal spoons can create ridges that look unappealing and may cause uneven melting. The silicone edge glides effortlessly, giving you a mirror‑like surface that’s perfect for that Instagram‑ready shine.
Creative Twists and Variations
This recipe is a playground. Here are some of my favorite ways to switch things up:
Nutty Delight
Stir in ¼ cup of toasted chopped pecans into the crust before baking. The nuts add a buttery crunch that pairs beautifully with the chocolate, and the slight bitterness of the pecans deepens the flavor profile. Ideal for those who love a little extra texture.
Spicy S’mores
Mix a pinch of cayenne pepper into the chocolate before spreading it over the crust. The heat cuts through the sweetness, creating a surprising kick that will wow adventurous eaters. Pair it with dark chocolate for an even richer, more complex taste.
Berry Burst
Top the chocolate layer with a handful of fresh raspberries before adding the marshmallows. The berries add a bright, tart contrast that balances the richness, and they look gorgeous when they burst under the broiler’s heat. Perfect for a summer twist.
Salted Caramel Swirl
Drizzle a thin ribbon of store‑bought salted caramel sauce over the melted chocolate, then swirl with a toothpick. The salty caramel adds depth and a luxurious finish that feels like a high‑end dessert.
Vegan Version
Swap butter for a plant‑based alternative, use a vegan chocolate bar, and replace mini marshmallows with vegan ones. The texture and flavor remain remarkably close to the original, making it inclusive for all guests.
Storing and Bringing It Back to Life
Fridge Storage
Allow the bowls to cool completely, then cover tightly with plastic wrap and store in the refrigerator for up to three days. The crust will stay firm, and the chocolate will set nicely, making it easy to slice and serve later.
Freezer Friendly
Wrap each bowl individually in parchment paper, then place them in a freezer‑safe bag. They freeze well for up to two months. When you’re ready to enjoy, thaw in the fridge overnight and reheat gently in a 300°F oven for 10 minutes.
Best Reheating Method
Before reheating, add a tiny splash (about a teaspoon) of water around the edges of the bowl. This creates steam that revives the crust’s softness while keeping the chocolate glossy. Heat in a preheated 350°F oven for 8‑10 minutes, then broil for a quick 30‑second finish to re‑toast the marshmallows.