Ever had a kitchen mishap that turned into a culinary revelation? I was halfway through a batch of over‑cooked sweet potatoes, the oven door stuck, and my countertop looked like a war zone of mashed orange pulp. I stared at the soggy disaster, thinking, “This is it—my new signature snack.” That moment of culinary crisis sparked a frantic experiment: I tossed in quinoa, panko, and a handful of spices, hoping to salvage the day. The result? A crunchy, flavorful bite that left me stunned and, frankly, a little guilty for devouring half the batch before anyone else could taste it.
Picture this: the kitchen hums with the low whir of the blender, the sweet scent of roasted sweet potatoes mingles with nutty quinoa, and the sizzle of a hot pan promises a golden crust. The texture is a delightful paradox—soft, fluffy interior encased in a crisp shell that shatters like thin ice under the first bite. The flavors dance: earthy sweetness, a hint of smokiness from paprika, a savory umami lift from nutritional yeast, and a subtle warmth from cumin. Every mouthful is a burst of comfort that feels like a hug from the inside out.
What makes this version stand out is not just the combination of ingredients but the method that elevates each component. I’ve perfected a technique that locks in moisture while creating a perfectly crisp exterior, a balance that most recipes either overemphasize or neglect entirely. The result is a snack that’s low‑calorie, high‑protein, and utterly addictive—hands down the best version you’ll ever make at home. And the best part? The ingredients are pantry staples, so you can whip up a batch in minutes, no fancy gadgets required.
I dare you to taste this and not go back for seconds. Picture yourself pulling these golden balls out of the oven, the whole kitchen smelling incredible, and watching friends stare in disbelief as you offer them a bite. Stay with me here—this is worth it. Let me walk you through every single step, and by the end, you’ll wonder how you ever made it any other way.
What Makes This Version Stand Out
- Texture: The combination of quinoa and panko creates a unique contrast—soft, fluffy interior with a crispy, crackling exterior that satisfies every crunch craving.
- Flavor Depth: Ground cumin and paprika add earthy warmth, while nutritional yeast delivers umami without the heaviness of cheese.
- Health Profile: Packed with protein, fiber, and healthy carbs, these balls are a guilt‑free snack that fuels the body and satisfies the palate.
- Versatility: Whether you’re a vegan, vegetarian, or omnivore, the recipe adapts seamlessly to dietary preferences.
- Make‑Ahead Friendly: Form the balls, refrigerate, and bake just before serving—no fresh ingredients needed, making it perfect for busy weeks.
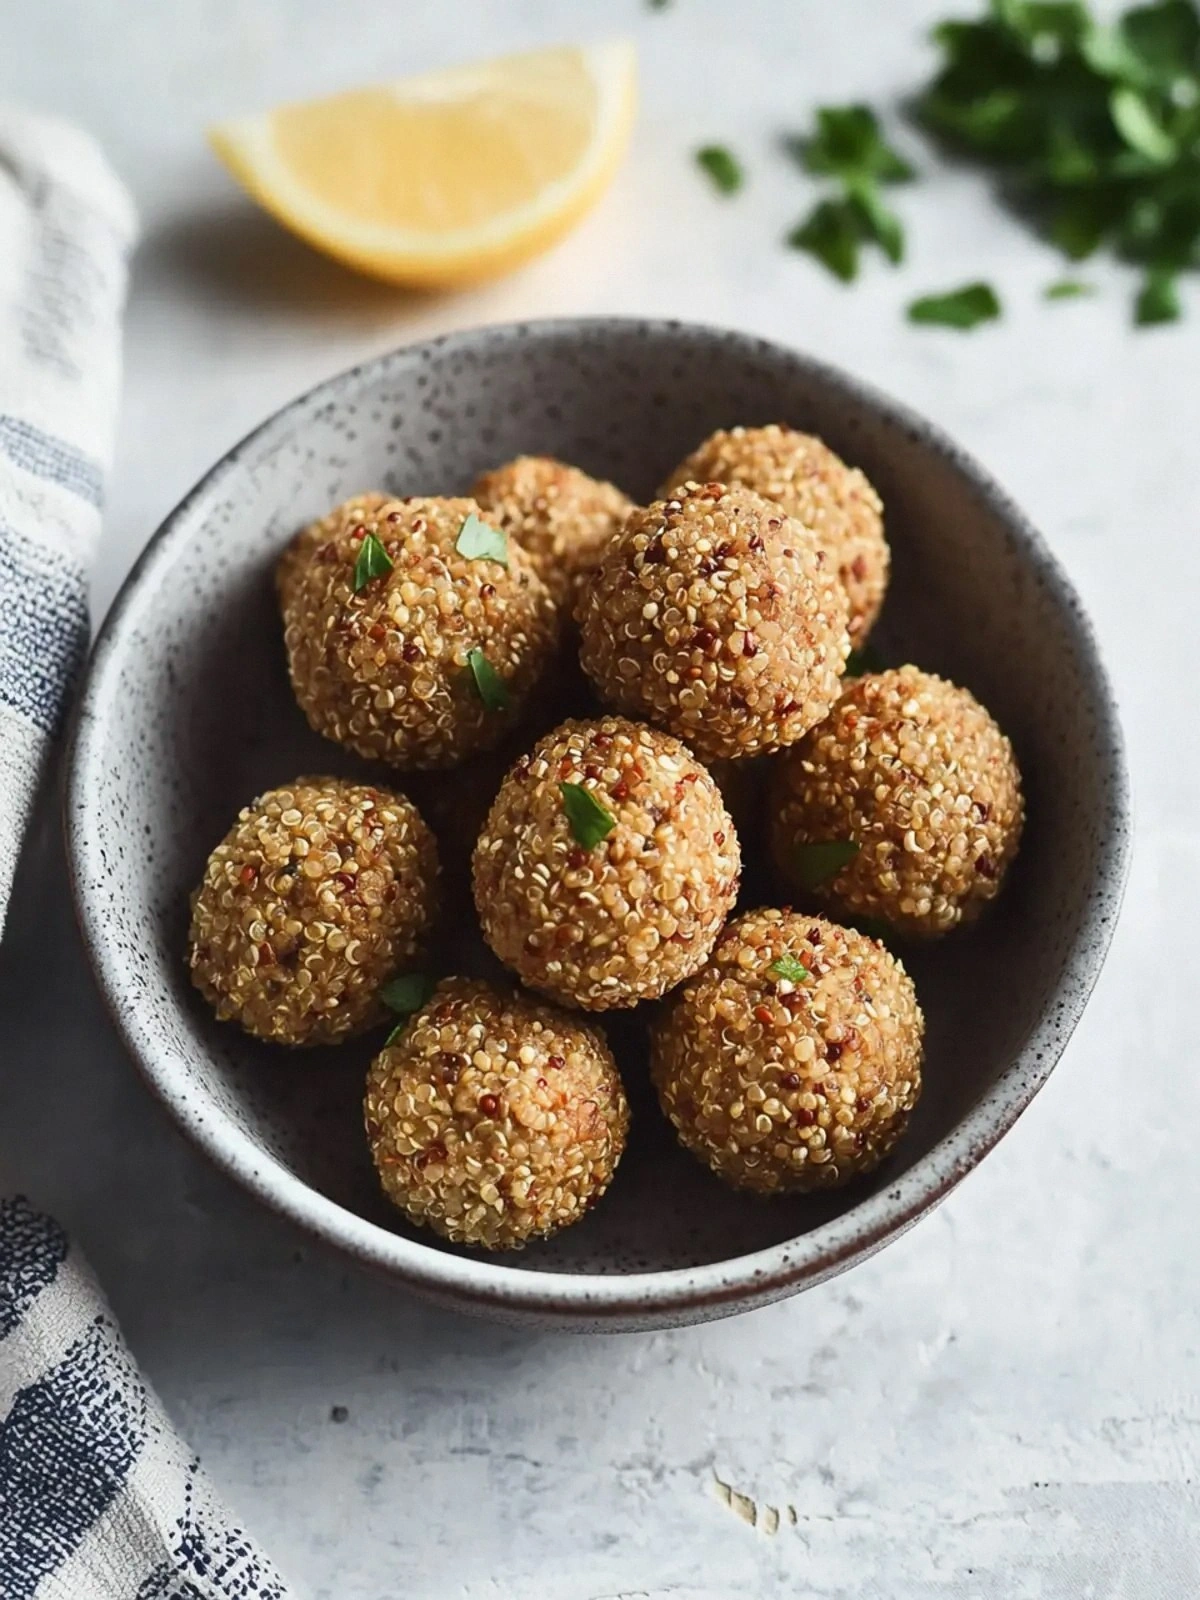
- Visual Appeal: The golden-brown crust glistens like a small sun, making them Instagram‑ready and mouth‑watering.
- Time Efficiency: Prep in 15 minutes, cook in 30 minutes—total 45 minutes, less than a typical dinner prep time.
- Kid‑Friendly: The mild spices and wholesome ingredients make it a hit with even the pickiest eaters.
Alright, let’s break down exactly what goes into this masterpiece…
Inside the Ingredient List
The Flavor Base
The foundation of any great dish is its flavor base, and in these quinoa balls, that base comes from the sweet potatoes. Their natural sweetness balances the earthiness of quinoa and the sharpness of spices. Boiling them until they’re buttery soft allows the flavors to meld, creating a smooth canvas for the rest of the ingredients. If you skip this step, the texture will be uneven, and the final product may feel raw or overly dense.
When selecting sweet potatoes, look for firm, unblemished skins. A thicker, fleshier potato provides more body to the mixture, while a smaller one will yield a lighter bite. For a subtle twist, you can roast the sweet potatoes first to deepen their caramelization before mashing. This small change introduces a smoky undertone that complements the cumin and paprika beautifully.
The Texture Crew
Quinoa is the star of the texture crew. Once cooked, it offers a fluffy yet slightly chewy bite that contrasts perfectly with the crunchy panko coating. The quinoa also acts as a binder, keeping the sweet potato mash together without the need for eggs or flour. If you’re working with a gluten‑free diet, quinoa’s natural gluten‑free properties make it an ideal choice.
Panko crumb is the secret weapon for that irresistible crunch. Unlike regular breadcrumbs, panko has larger, airier flakes that crisp up beautifully in the oven. Be careful not to overcoat; a light dusting is enough to create that satisfying crackle. If you’re feeling adventurous, mix panko with a touch of sesame seeds for added nuttiness.
The Unexpected Star
Nutritional yeast might sound like a pantry oddity, but it’s a powerhouse of flavor and nutrition. Rich in B vitamins and protein, it adds a cheesy, umami depth without dairy. If you prefer a more familiar taste, grated Parmesan works as a suitable substitute, but nutritional yeast keeps the dish vegan and lower in saturated fat. The key is to use it sparingly; too much can overpower the delicate balance of sweet and savory.
A quick fun fact: nutritional yeast was once a staple in the diets of ancient cultures, prized for its high protein content and ability to preserve food. Its name literally means “nutrient yeast,” a nod to its role as a nutritional supplement in modern times.
The final flourishes are the spices—garlic powder, salt, paprika, and cumin. They bring depth, warmth, and a subtle kick. Each spice plays a role: garlic powder adds a savory backbone, paprika offers smoky sweetness, cumin provides earthiness, and salt ties everything together. Skipping any of them will dilute the flavor profile, but feel free to experiment with their ratios to suit your taste.
Everything's prepped? Good. Let's get into the real action…
The Method — Step by Step
- Step 1: Prepare the Sweet Potatoes – Start by peeling and chopping two medium sweet potatoes into even cubes. Place them in a large pot, cover with cold water, and bring to a boil. Once boiling, reduce heat to a simmer and cook until the cubes are tender, about 15 minutes. Drain well and let them cool enough to handle. This step ensures the sweet potatoes are fully cooked, preventing any raw or rubbery texture in the final product.
- Step 2: Mash the Sweet Potatoes – Transfer the cooked sweet potatoes into a mixing bowl. Add a tablespoon of butter or a splash of olive oil to enhance richness. Use a potato masher or hand blender to mash until smooth. If the mixture feels too dry, sprinkle in a teaspoon of warm water or a bit of coconut milk to achieve a silky consistency. A smooth base ensures the quinoa blends evenly and the balls hold together.
- Step 3: Cook the Quinoa – Rinse one cup of quinoa under cold water to remove its natural bitter coating. In a saucepan, combine the quinoa with two cups of water or vegetable broth for added flavor. Bring to a boil, then reduce heat to low, cover, and simmer for 15 minutes until the liquid is absorbed. Fluff with a fork and allow it to cool slightly before mixing with the sweet potato mash. Quinoa’s protein content makes these balls a power snack.
- Step 4: Combine the Mixture – Gently fold the cooked quinoa into the sweet potato mash. Add 1/4 cup of nutritional yeast (or grated Parmesan) and stir until evenly distributed. The yeast adds umami and a subtle cheese-like flavor that binds the mixture. If the batter feels too loose, incorporate a tablespoon of oat flour or more panko to help it hold together.
- Step 5: Season the Batter – Sprinkle in 1 teaspoon each of garlic powder, salt, paprika, and cumin. Mix thoroughly, ensuring the spices coat every grain. Taste the mixture; you should hear a faint kick from the cumin and a smoky hint from paprika. This step is crucial—under-seasoning will leave the balls bland, while over-seasoning can overwhelm the delicate sweet potato flavor.
- Step 6: Form the Balls – With a small cookie scoop or spoon, portion out the mixture into bite‑sized balls, about the size of a golf ball. Place them on a parchment‑lined baking sheet, leaving space between each. If you’re not baking immediately, cover the sheet with plastic wrap and refrigerate for at least 30 minutes to firm up.
- Step 7: Bake the Balls – Preheat your oven to 400°F (200°C). Brush the balls lightly with olive oil or spray with cooking spray to promote browning. Place the baking sheet in the oven and bake for 20–25 minutes, turning halfway through. The balls should be golden brown on the outside and firm to the touch. The aroma that fills the kitchen at this point is irresistible—watch your friends’ eyes widen as they anticipate the first bite.
- Step 8: Finish and Serve – Allow the balls to cool for a few minutes on the baking sheet; they’ll continue to firm up slightly. Serve warm, optionally with a side of yogurt dip, hummus, or a drizzle of tahini. The combination of warm, crispy exteriors and soft interiors makes them perfect for a quick snack or an impressive appetizer.
That’s it—you did it. But hold on, I've got a few more tricks that’ll take this to another level…
Insider Tricks for Flawless Results
The Temperature Rule Nobody Follows
Many people bake at a lower temperature, hoping to avoid burning, but that actually leads to a soggy exterior. The secret is to bake at a high, steady temperature—400°F (200°C)—to ensure the outer shell crisps up while the interior stays moist. If you notice the edges browning too quickly, slide the tray to a lower rack and reduce the time by a couple of minutes.
Why Your Nose Knows Best
Trust the aroma—it’s your best judge of doneness. When the balls start to emit a nutty, slightly sweet scent, it means the panko is browning and the interior is cooking through. If the smell is faint, give them a few more minutes. This sensory checkpoint saves you from overcooking or undercooking.
The 5-Minute Rest That Changes Everything
After baking, let the balls rest on the sheet for five minutes. This pause allows the juices to redistribute, preventing them from spilling out when you bite into them. It also lets the outer crust set, ensuring a crisp bite every time. I’ve seen friends who skip this step complain about soggy centers—don’t let that happen to you.
Freeze and Reheat Like a Pro
If you’re making a large batch, freeze the unbaked balls on a parchment‑lined tray. Once frozen, transfer them to a zip‑lock bag. When you’re ready to eat, bake directly from the freezer—just add a minute or two to the cooking time. This method keeps the texture intact and saves you the hassle of thawing.
Pairing Ideas That Elevate the Experience
Serve them with a tangy yogurt dip or a spicy harissa sauce for a flavor explosion. For a healthier twist, drizzle a light honey‑mustard glaze over the top before serving. These pairings amplify the savory notes and add a new dimension to each bite.
Creative Twists and Variations
This recipe is a playground. Here are some of my favorite ways to switch things up:
Spicy Chipotle Edition
Swap the paprika for chipotle powder and add a pinch of cayenne. The smoky heat will turn the balls into a fiery snack that’s perfect for game day.
Herb‑Infused Green
Add a handful of chopped fresh parsley, cilantro, or basil to the mixture. The green herbs give a fresh burst of flavor and a pop of color.
Cheesy Cheddar Crunch
Replace the nutritional yeast with shredded cheddar and sprinkle extra cheddar on top before baking. The result is a gooey, cheesy exterior that melts beautifully.
Asian‑Inspired Sesame
Toss the panko with toasted sesame seeds and a splash of soy sauce before coating the balls. Serve with a side of wasabi mayo for a sushi‑inspired snack.
Sweet & Savory Coconut
Add shredded coconut to the batter and drizzle a coconut‑lime sauce over the finished balls. The tropical sweetness balances the savory spices, creating a unique flavor profile.
Protein Powerhouse
Mix in a scoop of plant‑based protein powder to the quinoa mix. This addition boosts the protein content without altering the taste, making it ideal for post‑workout refueling.
Storing and Bringing It Back to Life
Fridge Storage
Store cooked quinoa balls in an airtight container in the refrigerator for up to five days. The airtight seal prevents moisture loss, keeping the balls fresh and crisp. When you’re ready to eat, simply reheat them in a toaster oven or microwave for 30 seconds.
Freezer Friendly
For longer storage, place the unbaked balls on a parchment‑lined sheet and freeze until solid. Transfer them to a zip‑lock bag and store for up to two months. When you want to enjoy them, bake from frozen—just add a minute or two to the baking time.
Best Reheating Method
The secret to reviving the crunch is to reheat in a preheated oven at 375°F (190°C) for 5–7 minutes. If you prefer a quick fix, microwave on high for 30 seconds, then transfer to a skillet for a minute to crisp the edges. Adding a tiny splash of water before reheating creates steam, which restores moisture and prevents the balls from drying out.