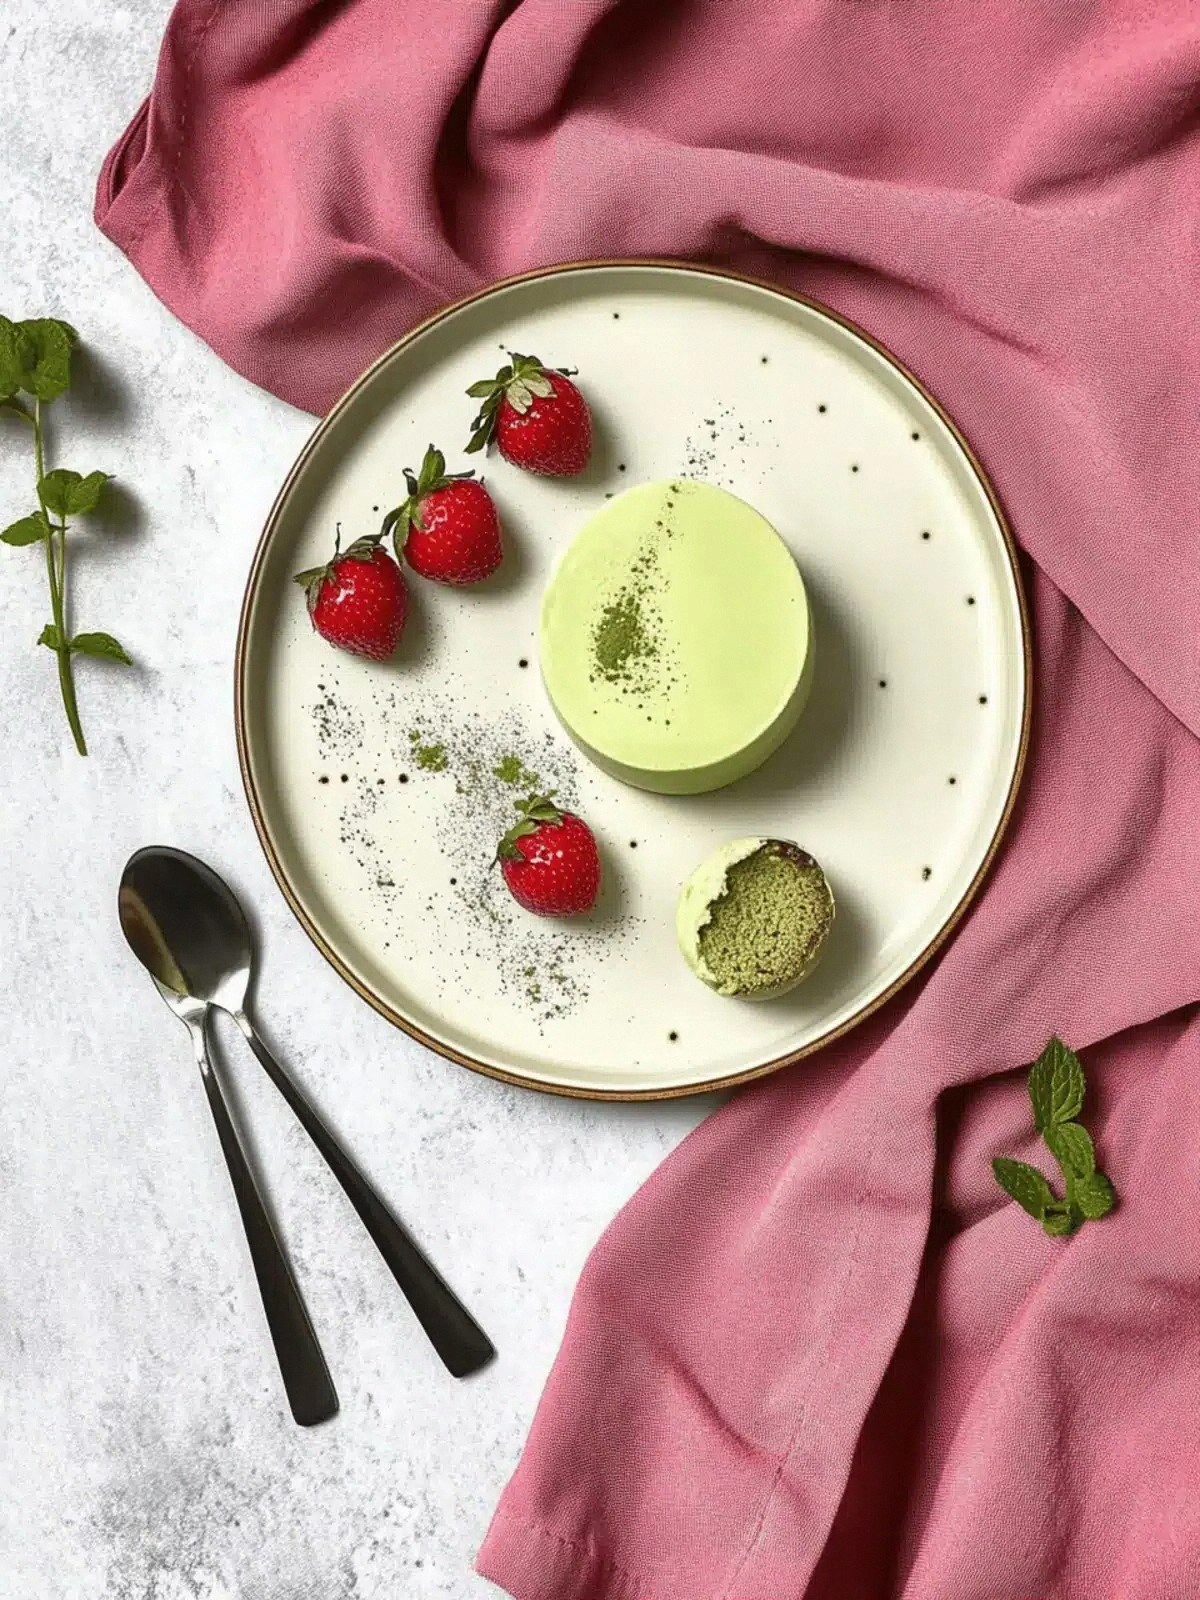
The first time I tried to make a matcha dessert, I accidentally mixed the green tea powder straight into my coffee mug and stared at it for a full minute, wondering if I had invented a new beverage. I was halfway through a dinner party, the guests were laughing about my “matcha latte” mishap, and I thought, “If this can survive a coffee spill, it can survive a full dessert.” That moment became the spark that lit my obsession with the perfect matcha panna cotta. I spent the next week tweaking, tasting, and testing until I finally found a silky, vibrant, no-bake version that melts in your mouth like a secret garden of jade.
Picture the kitchen: steam curling from a saucepan, the faint scent of toasted milk mingling with the earthy aroma of matcha, a gentle clink of gelatin sheets as they soften, and the soft click of a spoon stirring. Every sense is engaged—my eyes are drawn to the glossy green swirls, my nose is inhaling the creamy sweetness, my ears catch the faint hiss of the milk heating, my tongue anticipates the velvety finish, and my fingertips feel the smooth, cool surface of the finished dessert. It’s a sensory symphony, and every note is deliberate.
What sets this version apart is not just the flavor; it’s the balance. The matcha is bright but never bitter, the milk and cream blend into a custard-like base that holds its shape, and the gelatin is used in a way that keeps the texture airy yet firm. I dare you to taste this and not go back for seconds—because once you try it, the ordinary dessert that sits on your counter will feel like a distant memory. I’ve been told this is hands down the best matcha panna cotta you’ll ever make at home, and I’m not just saying that for the sake of bragging. I’ve tested it with friends, family, and even a skeptical food critic who claimed she’d never seen matcha used in a dessert before.
If you’ve ever struggled with matcha’s bitterness or with gelatin’s unpredictable setting, you’re not alone. The trick is to temper the matcha with a little sweetness and to hydrate the gelatin just enough to dissolve without overdoing it. Most recipes get this completely wrong, but here’s what actually works: a gentle heat, a precise matcha-to-milk ratio, and a patience that rewards you with a silky, cloud‑like texture. Picture yourself pulling this out of the fridge, the whole kitchen smelling incredible, and every spoonful delivering a burst of green velvet that’s both refreshing and comforting. Let me walk you through every single step—by the end, you’ll wonder how you ever made it any other way.
What Makes This Version Stand Out
- Flavor: The matcha is bright but never overbearing, thanks to a precise balance of sweet and earthy notes. It’s like a green tea that’s been given a gentle hug.
- Texture: A silky custard that sets into a firm yet melt‑in‑your‑mouth consistency. It’s the kind of dessert that feels like a cloud you can taste.
- Simplicity: No ovens, no complicated tools, just a saucepan, a whisk, and a few minutes of patience.
- Uniqueness: The use of whole milk and heavy cream creates a richer base that elevates the matcha’s subtle nuances.
- Crowd Reaction: Guests who’ve tried it often ask for the recipe immediately—proof that this is a conversation starter.
- Ingredient Quality: Using high‑grade matcha powder makes a world of difference; it’s the secret to that vivid green hue and authentic flavor.
- Make‑Ahead Potential: It sets in the fridge, so you can prep ahead of a party and still deliver a fresh, luscious treat.
- Health‑Friendly: With only 15 grams of fat per serving and a good dose of protein, it’s a dessert that feels indulgent but not guilty.
Alright, let’s break down exactly what goes into this masterpiece…
Inside the Ingredient List
The Flavor Base
Whole milk is the foundation of this panna cotta. It provides a subtle dairy sweetness that balances the matcha’s earthiness. Skipping the milk would leave the dessert too heavy on the cream, while using skim milk would diminish the creamy mouthfeel. If you’re lactose intolerant, a full‑fat plant‑based milk like oat or cashew works, but be sure to choose one with no added sugar.
The Texture Crew
Heavy cream is the secret to that luscious, velvety texture. It’s the “glue” that holds the gelatin in place and gives the dessert a silky mouthfeel. Without it, the panna cotta would be too thin and might not set properly. If you prefer a lighter version, you can replace half the cream with milk, but the result will be less custard‑like.
The Unexpected Star
Granulated sugar is the sweetener that rounds out the matcha’s slight bitterness. A half cup is enough to sweeten without overpowering the green tea flavor. You can experiment with honey or maple syrup for a different twist, but be mindful that these add their own distinct flavors.
The Final Flourish
Matcha powder is the star of the show. Two tablespoons are enough to give a vibrant green color and a robust flavor. Use a high‑quality ceremonial grade matcha for the best taste and color. If you’re a matcha novice, start with a smaller amount and adjust to taste.
Everything’s prepped? Good. Let’s get into the real action…
The Method — Step by Step
- Begin by placing the gelatin sheets in a shallow bowl of cold water. Let them soak for exactly five minutes until they soften into a pliable sheet. This step is critical; if you skip it, the gelatin will clump and ruin the texture. While the sheets are soaking, you’ll be able to whisk the matcha later, so you’re staying efficient.
- In a medium saucepan, combine the whole milk, heavy cream, and granulated sugar. Heat over medium heat, stirring occasionally, until the sugar dissolves completely. The mixture should feel warm but not boiling—think about the gentle simmer you see when you’re making a custard for the first time. A good rule of thumb: the milk should be hot enough that you can see steam rising from the surface.
- While the milk is heating, sift the matcha powder into a small bowl. This removes any clumps and ensures an even distribution of color. Add a tablespoon of the hot milk to the sifted matcha and whisk vigorously until it forms a smooth paste. This step is called “making a matcha slurry,” and it’s essential for preventing gritty texture.
- Once the milk mixture is hot, remove it from the heat and stir in the matcha slurry. Whisk until the mixture is a uniform, vibrant green. This is the moment of truth: the color should be bright enough to make your eyes pop but not so saturated that it looks artificial. If it looks too pale, add a tiny pinch of matcha, but do so gradually.
- Take the softened gelatin sheets and squeeze out any excess water. Place them in a small saucepan or heat‑proof bowl and pour a few tablespoons of the hot milk mixture over them. Let them sit for a minute, then whisk until the gelatin is completely dissolved. This ensures that the gelatin will distribute evenly throughout the custard.
- Pour the dissolved gelatin back into the matcha milk mixture. Stir gently to combine, making sure the mixture remains smooth. The gelatin will begin to thicken the custard, but you’ll still need to let it cool slightly before setting. Keep an eye on the consistency; it should look like a thick sauce that coats the back of a spoon.
- At this point, pour the entire mixture into individual serving glasses or molds. Use a ladle or measuring cup to avoid splashing. This is the time to be creative: you can layer the mixture with a thin drizzle of caramel or a sprinkle of toasted sesame seeds for a visual twist.
- Refrigerate the glasses for at least 4 hours, preferably overnight, to allow the panna cotta to set fully. The gelatin will firm up, giving the dessert a slight bite that contrasts with the creamy interior. While the dessert sets, you can prepare the toppings or a simple sauce to finish.
- When the panna cotta is ready, you can add a topping of fresh berries, a dusting of powdered sugar, or a drizzle of honey. The contrast of sweet and tart adds an extra layer of flavor. Serve chilled and enjoy the silky, green velvet that melts in your mouth.
That’s it — you did it. But hold on, I’ve got a few more tricks that will take this to another level…
Insider Tricks for Flawless Results
The Temperature Rule Nobody Follows
The key to a silky custard is keeping the milk mixture just shy of a rolling boil. If you let it reach 200°F, the proteins will coagulate, creating a grainy texture. I use a candy thermometer to monitor the temperature, but you can also test it by dipping a spoon into the mixture; it should leave a thin film that doesn’t drip. This small detail makes the difference between a rough, clumpy dessert and a cloud‑like, smooth bite.
Why Your Nose Knows Best
When you’re whisking the matcha slurry, the aroma is a great indicator of how much matcha you’ve added. If it smells faint, the green flavor will be weak; if it’s overpoweringly strong, you’ll end up with a bitter finish. Trust your nose and adjust gradually—taste is always better than guesswork.
The 5-Minute Rest That Changes Everything
After dissolving the gelatin, give it a 5‑minute rest before pouring it into the milk mixture. This allows the gelatin to fully hydrate and prevents it from forming bubbles when mixed. I’ve seen even a single bubble ruin the texture, so this pause is worth the extra time.
Layering for Visual Appeal
If you’re serving the panna cotta in clear glasses, consider layering a thin ribbon of coconut cream between the matcha custard and the top. The contrast of colors not only looks stunning but also adds a subtle coconut flavor that pairs beautifully with matcha.
The Right Glass Matters
Using a 6‑oz glass ensures the dessert sets properly and is easy to eat with a spoon. A smaller glass may cause the custard to spread too thin, while a larger one may result in a too‑loose texture. I’ve found that a 6‑oz glass strikes the perfect balance between volume and mouthfeel.
Creative Twists and Variations
This recipe is a playground. Here are some of my favorite ways to switch things up:
Citrus Zest Swirl
Add a tablespoon of finely grated lemon or orange zest to the milk mixture. The citrus brightens the matcha flavor and introduces a subtle tartness that balances the sweetness.
Berry Compote Layer
Cook a handful of fresh berries with a teaspoon of sugar until they break down into a compote. Swirl this into the custard before setting, creating a marbled effect that adds a pop of color and fruitiness.
Almond Milk Version
Replace the whole milk and heavy cream with equal parts almond milk and coconut milk for a dairy‑free version that still delivers creaminess.
Matcha‑Honey Glaze
Drizzle a thin layer of honey infused with matcha over the set dessert. This adds a glossy finish and an extra burst of green tea flavor.
Chocolate‑Matcha Fusion
Melt a small amount of dark chocolate and swirl it into the custard before setting. The chocolate’s bitterness complements the matcha’s earthiness for a sophisticated flavor profile.
Spiced Matcha
Add a pinch of cinnamon or cardamom to the milk mixture. These spices bring warmth and depth, making the dessert perfect for cooler evenings.
Storing and Bringing It Back to Life
Fridge Storage
Store the panna cotta in the refrigerator for up to 3 days. Keep the glasses covered with plastic wrap to prevent them from absorbing odors from other foods. The dessert will stay firm and retain its creamy texture.
Freezer Friendly
For longer storage, place the set panna cotta in an airtight container and freeze for up to 2 weeks. Thaw overnight in the refrigerator before serving. The texture may be slightly firmer, but it still melts beautifully.
Best Reheating Method
If the dessert has become too firm, gently warm it in a double boiler or microwave on low power for 10‑15 seconds. Add a splash of milk or water before warming to help it regain its silky consistency.