I was standing in the middle of my kitchen, a pile of soggy, half‑cooked burgers in front of me, when my friend dared me to turn them into something that would make everyone in the house swoon. The air smelled of burnt onions and stale grease, and I could feel the heat of disappointment rising in my chest. I laughed, because if there’s a lesson in culinary disasters, it’s that a little confidence and a bold tweak can save the day. And that’s exactly what happened when I decided to smash the patties, season them to the bone, and let the sear do the rest.
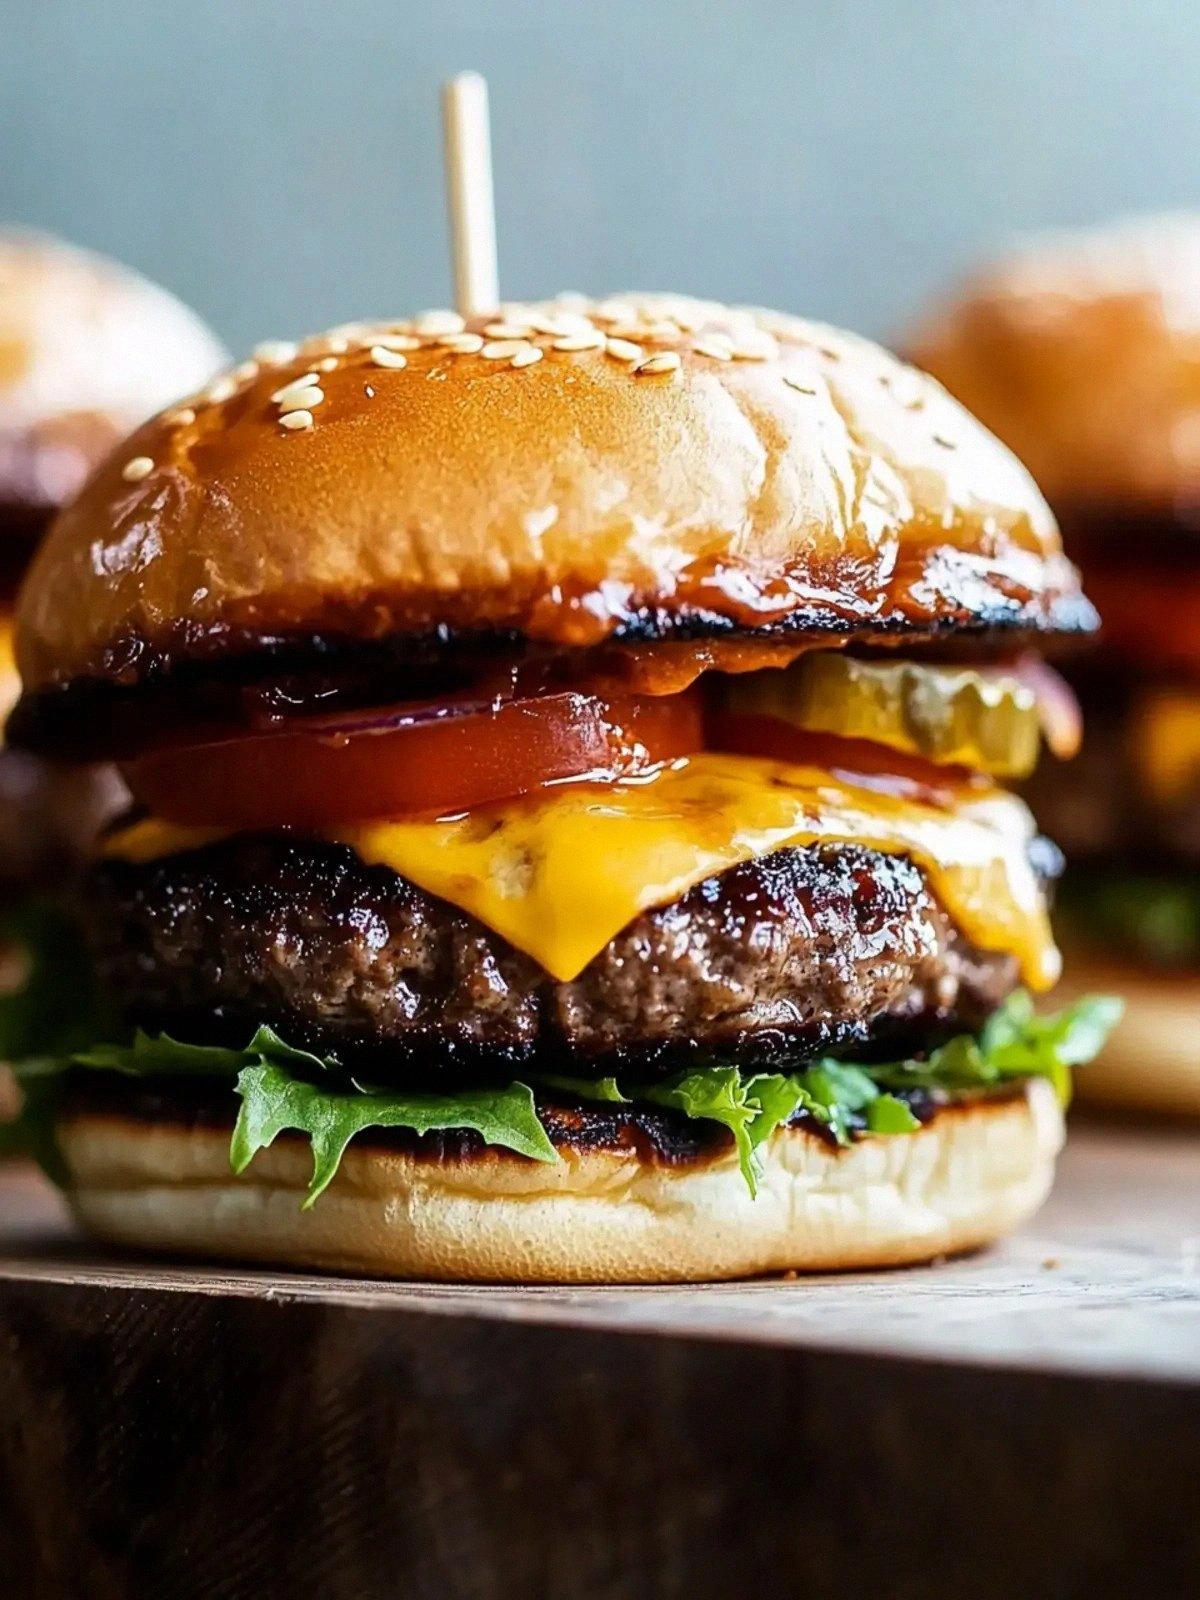
Picture this: the sizzle that erupts the moment the patty hits the pan is like fireworks for your ears. The aroma of garlic powder, mustard, and a splash of Worcestershire sauce fills the kitchen, turning it into a savory carnival. Your fingertips feel the rough, caramelized crust of the burger, and when you take the first bite, the juices burst like a small, delicious explosion, coating your tongue in a buttery, smoky glaze that lingers. The cheddar melts into a golden ribbon that stretches with each chew, while the toasted bun offers a crisp bite that snaps before giving way to the savory interior. Every sensory element—sight, smell, sound, taste, and touch—converges into a single, unforgettable experience.
What makes this version stand out is that I stripped away the fluff. No excess fat, no pre‑formed patties that lose their shape, and no bland seasoning. Instead, I let the meat do the talking, adding just enough spice to punch the flavor without drowning it. The result is a burger that is simultaneously juicy and crispy, smoky and sweet, with a depth of flavor that would make a Michelin‑star chef pause to take a bite. I dare you to taste this and not go back for seconds.
If you've ever struggled to get the right balance of moisture and crunch, you're not alone. Most recipes get this completely wrong—either they over‑cook the meat, leaving it dry, or they under‑season it, resulting in a bland, forgettable patty. This is hands down the best version you'll ever make at home because it uses a simple technique that locks in juices while creating a caramelized crust that is pure, unadulterated flavor. Picture yourself pulling this out of the pan, the whole kitchen smelling incredible, and the anticipation building as your friends gather around the table. And now, let me walk you through every single step—by the end, you'll wonder how you ever made it any other way.
What Makes This Version Stand Out
- Taste: The seasoning blend is a harmonious blend of garlic, onion, mustard, and a splash of Worcestershire that elevates the beef without overpowering its natural flavor. The result is a punchy, savory profile that lingers on the palate.
- Texture: The smash technique creates a thin, caramelized crust that is crispy on the outside yet still juicy inside. The cheese melts into a gooey ribbon that adds a creamy contrast.
- Simplicity: No fancy equipment, no complicated steps—just a skillet, a spatula, and a dash of confidence. This is the kind of recipe that turns a busy evening into a gourmet experience.
- Uniqueness: The subtle use of ground mustard and Worcestershire sauce gives this burger a depth that you rarely find in standard smash burgers, setting it apart from the crowd.
- Crowd Reaction: Friends and family will be amazed by the crispy edges that shatter like thin ice, and the juicy interior will have them asking for seconds.
- Ingredient Quality: Using a 1‑pound ground chuck with a 20% fat content ensures maximum juiciness and flavor, while the cheddar adds a rich, melty finish.
- Cooking Method: Smashing the patty in a hot pan not only speeds up cooking but also creates a Maillard reaction that gives the burger its signature caramelized flavor.
- Make‑Ahead Potential: The burgers can be pre‑made and stored, then reheated to retain their crispness, making it perfect for meal prep or a quick dinner.
Alright, let's break down exactly what goes into this masterpiece…
Inside the Ingredient List
The Flavor Base
Ground Chuck is the star of this burger. A 1‑pound patty with a 20% fat content delivers a juicy, rich flavor that can’t be replicated with leaner cuts. The fat renders during cooking, basting the meat from the inside and keeping it moist. If you skip the chuck and use a leaner cut, you’ll end up with a dry, rubbery patty that will make the rest of the ingredients feel like a disappointment.
Ground Chuck also contains a subtle amount of connective tissue that breaks down during the smash, adding a silky texture to the interior. When you bite into the burger, you’ll notice that the meat feels almost buttery, not just meaty. If you’re on a lower‑fat diet, you can substitute a leaner ground beef, but be prepared to add a tablespoon of oil to compensate for the lost moisture.
The Seasoning Squad
The seasoning mix—black pepper, garlic powder, onion powder, ground mustard, Worcestershire sauce, and kosher salt—forms the backbone of the burger’s flavor profile. Each component plays a distinct role: black pepper adds heat; garlic and onion powders bring depth; mustard introduces a tang; Worcestershire sauce adds umami; and kosher salt balances everything.
If you’re a fan of extra heat, add a pinch of cayenne pepper or a dash of hot sauce to the mix. Conversely, if you’re sensitive to spices, reduce the black pepper to a quarter teaspoon. The key is to taste the meat before cooking; a well‑seasoned patty should have a robust, savory aroma that hints at the layers inside.
The Unexpected Star
Cheddar cheese might seem ordinary, but it’s the unexpected star that elevates this burger. The sharp, slightly nutty flavor of cheddar cuts through the richness of the meat, while its meltability creates a luscious, gooey topping that ties everything together.
If you’re looking for a twist, try pepper jack for a mild heat or Gruyère for a nutty, caramelized finish. The cheese should be sliced thinly to allow it to melt quickly, preventing it from becoming a greasy blanket over the patty.
The Final Flourish
Vegetable oil is used to ensure the pan stays slick enough for the patty to smash and sear without sticking. A tablespoon of oil per batch is sufficient; too much oil will create a greasy base, while too little will cause the patty to adhere and tear.
Burger buns are the final canvas. Choose a sturdy, slightly sweet bun that can hold the juicy patty without falling apart. Lightly toast them in the same pan after cooking the burgers; the residual heat will give them a golden crunch that complements the meat’s caramelized crust.
Everything's prepped? Good. Let's get into the real action…
The Method — Step by Step
- Gather all your ingredients and let the meat come to room temperature. This ensures even cooking and a consistent sear. The beef should feel firm yet slightly yielding when pressed. If it’s too cold, the patty will not smash properly.
- Divide the ground chuck into 4 equal portions, roughly 4 ounces each. Form each portion into a loose ball—do not press them into tight patties. The looser the shape, the more surface area you’ll have to smash later. This step is crucial for that signature thin, crispy crust.
- Preheat a heavy skillet or cast‑iron pan over high heat until it starts to smoke lightly. Add 2 tablespoons of vegetable oil, swirling to coat the surface. The oil should shimmer; if it starts to burn, reduce the heat slightly.
- Place a ball of meat on the hot pan and let it sit untouched for 30 seconds. This initial sear begins the Maillard reaction. Do not move it; let the crust form. You’ll hear a deep, satisfying sizzle.
- Using a sturdy spatula, press the patty flat with a quick, decisive motion. The goal is a thickness of about 1/4 inch. The edges should start to pull away from the pan, indicating a good sear. If you see steam, reduce the heat slightly.
- Season both sides of the patty with salt, pepper, garlic powder, onion powder, mustard, and Worcestershire sauce. Sprinkle the spices evenly; they should form a thin, fragrant crust. The Worcestershire sauce adds a subtle umami depth that’s impossible to replicate with salt alone.
- Cook the patty for 2 minutes on the first side. The surface will be blistered and caramelized. Flip it, and place a slice of cheddar on top. Cover the pan with a lid for 30 seconds to melt the cheese evenly. The cheese should be molten but not dripping.
- While the cheese melts, lightly toast the buns in the same pan. Place them cut‑side down for 15–20 seconds, or until golden. This step adds crunch and a buttery aroma that complements the burger’s flavor.
That's it — you did it. But hold on, I've got a few more tricks that'll take this to another level. These little details can make the difference between a good burger and a legendary one.
Insider Tricks for Flawless Results
The Temperature Rule Nobody Follows
The pan’s temperature is the secret sauce. If it’s too hot, the burger will burn on the outside before the inside cooks; if it’s too low, you’ll get a greasy, soggy patty. Aim for a pan that reaches 400°F (204°C). A quick way to test is to sprinkle a few drops of water on the surface; if they dance and evaporate within a second, you’re good.
Why Your Nose Knows Best
Before flipping, trust your nose. The aroma of a caramelized crust will tell you the burger is ready. If you smell a sharp, metallic scent, the patty is burning. If it’s still raw, give it a minute more. Your nose is a reliable judge of doneness.
The 5-Minute Rest That Changes Everything
After cooking, let the burger rest for 5 minutes on a cutting board. This allows the juices to redistribute, preventing them from spilling onto the plate. It also gives the cheese a chance to set, making each bite perfectly balanced.
The Cheese Placement Trick
Place the cheddar slice on the patty right after flipping. The heat from the pan will melt the cheese quickly, and the melted cheese will seep into the meat, adding a subtle depth of flavor that’s hard to replicate with pre‑sliced cheese.
The Smash Tool
If you don’t have a spatula strong enough to smash, use a pizza cutter or a flat side of a heavy pan. The more even the pressure, the more uniform the crust. A thin, even patty ensures the burger cooks evenly from edge to center.
Creative Twists and Variations
This recipe is a playground. Here are some of my favorite ways to switch things up:
Bacon‑Cheddar Smash
Add a few strips of crispy bacon inside the patty before adding the cheese. The bacon’s smoky flavor pairs beautifully with the beef, while the extra fat keeps the burger moist.
Spicy Jalapeño Smash
Incorporate finely chopped jalapeños into the seasoning mix. The heat will contrast the richness of the meat, creating a vibrant flavor profile that’s perfect for summer.
Blue Cheese & Caramelized Onion
Swap cheddar for blue cheese and top with caramelized onions. The tangy blue cheese cuts through the beef’s richness, while the sweet onions add a subtle depth of flavor.
Mushroom Swiss Smash
Sauté sliced mushrooms in butter and garlic, then press them onto the patty before adding Swiss cheese. The earthy mushrooms complement the beef, and the Swiss provides a mild, nutty finish.
Pesto Smash
Spread a thin layer of basil pesto on the bun before adding the patty. The pesto’s herbal brightness lifts the burger, making it feel lighter and more refreshing.
Breakfast Smash
Serve the burger with a fried egg and a drizzle of hot sauce for a hearty breakfast. The yolk adds richness, while the sauce adds a zing that wakes up the senses.
Storing and Bringing It Back to Life
Fridge Storage
Store cooked burgers in an airtight container in the refrigerator for up to 3 days. Keep the buns separate to prevent them from getting soggy. When ready to reheat, place the burgers on a microwave‑safe plate and cover with a damp paper towel for 30–45 seconds.
Freezer Friendly
Freeze cooked burgers in a freezer bag, pressing out excess air. They will stay fresh for up to 2 months. Thaw overnight in the refrigerator before reheating.
Best Reheating Method
The best way to revive the crispy crust is to reheat the burgers in a hot skillet over medium heat, flipping once. Add a splash of water to the pan, cover, and let steam for 1–2 minutes. The water will steam the burgers, bringing back the juicy interior while the skillet restores the crunch.