I still remember that night when my kitchen felt like a battleground. I had just finished a marathon baking session, the air thick with vanilla and butter, and my friends dared me to make a cookie that would make them beg for seconds. I laughed, grabbed a bag of chocolate chips and a handful of candy pieces, and decided to throw everything into the batter. The result? A cookie so monstrous in flavor and texture that I almost didn’t eat the first one. If you’ve ever felt guilty for eating half a batch before anyone else, this is the recipe that justifies it.
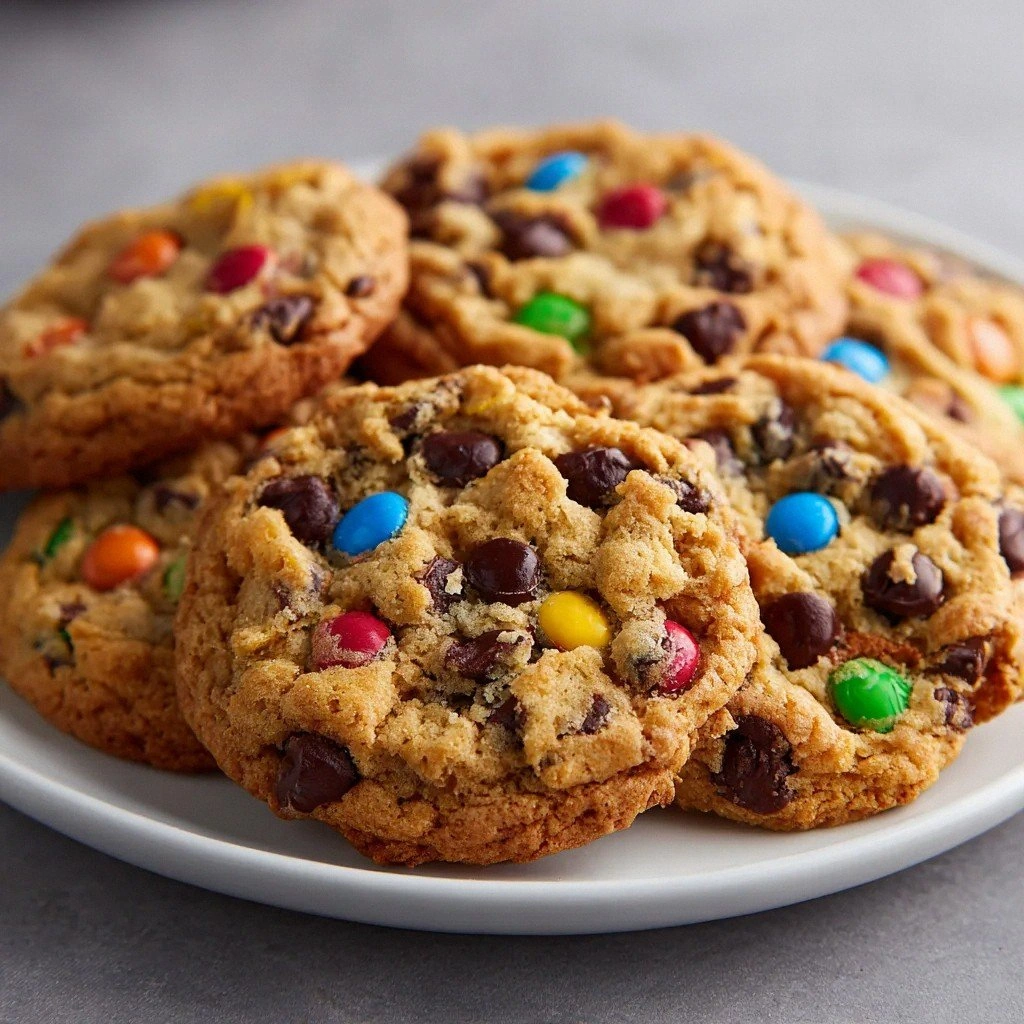
The first bite is a symphony of crunch and goo. The chocolate chips melt into a silky center while the candy pieces add a playful pop of color and crunch. The aroma—warm, buttery, with a hint of caramel—fills the room like a cozy hug. The texture is a delightful paradox: a crisp edge that gives way to a chewy, molten core that drips with melted chocolate. The visual effect of the candy peeking out is almost too pretty to eat, yet you’re compelled to devour it all at once.
What sets this version apart is the intentional layering of flavors and the precise balance of ingredients. I tweaked the sugar ratio to keep the cookies chewy without making them overly sweet. The butter is softened to the right point to create a tender crumb, while the chocolate chips are added just before baking to preserve their melt. The candy pieces are folded in gently to avoid crushing them, so each bite contains that satisfying crunch. It’s not just a cookie; it’s a confectionery experience that feels like a party in your mouth.
And here’s the kicker—you’ll discover a technique that most recipes overlook: the “double bake” trick. After the first bake, I let the cookies cool just enough that the chocolate starts to set but is still warm enough to keep the candy pieces intact. A quick second bake at a lower temperature gives them that perfect glossy finish. I dare you to taste this and not go back for seconds. By the end, you’ll wonder how you ever made it any other way.
What Makes This Version Stand Out
- Taste: The caramelized brown sugar gives a subtle depth that balances the sweet candy, creating a flavor profile that’s both nostalgic and adventurous.
- Texture: The cookies are crisp on the outside and chewy on the inside, with chocolate chips that melt into a silky center while candy pieces stay firm for a crunchy surprise.
- Simplicity: All ingredients are pantry staples; no exotic spices or hard-to-find items required.
- Uniqueness: The candy stuffing technique transforms ordinary cookies into a playful, monster‑like treat that’s perfect for parties.
- Crowd Reaction: Friends and family are instantly hooked; the first bite usually results in a collective “oh my God” moment.
- Ingredient Quality: Using high‑quality chocolate chips and real candy pieces ensures a richer flavor and better texture.
- Cooking Method: The double bake method preserves the candy’s crunch while giving the cookie a glossy finish.
- Make‑Ahead Potential: These cookies can be stored for up to a week in an airtight container, making them ideal for last‑minute gatherings.
Alright, let's break down exactly what goes into this masterpiece…
Inside the Ingredient List
The Flavor Base
Unsalted butter is the heart of these cookies. When softened to a spreadable consistency, it blends seamlessly with sugars, creating a rich, buttery flavor that permeates every bite. If you skip butter, the cookies lose that deep, mouth‑watering richness and become flat and dry. For an extra indulgent touch, try using European butter, which has a higher fat content and gives the dough a silkier texture.
The Texture Crew
Brown sugar and granulated sugar are the dynamic duo that control moisture and browning. Brown sugar’s molasses content adds chewiness and a caramel note, while granulated sugar ensures a crisp edge. If you omit one, the cookies either become too hard or too soft. A quick swap: use coconut sugar for a slightly tropical undertone, but be mindful of its coarser texture.
The Unexpected Star
The candy pieces—whether M&Ms or chocolate‑covered candies—are the showstopper. They add a burst of color, a pop of crunch, and a playful element that kids and adults alike adore. If you’re looking for a healthier twist, try using dark chocolate chunks or dried fruit pieces. Just remember to adjust the sweetness accordingly.
The Final Flourish
All‑purpose flour provides structure, while baking soda and salt control leavening and flavor balance. Baking soda ensures the cookies rise slightly, giving them a light, airy interior. Salt, though only a pinch, enhances every other flavor and prevents the sweetness from becoming cloying. If you’re gluten‑free, substitute with a 1:1 gluten‑free flour blend, but add a teaspoon of xanthan gum to maintain structure.
Everything's prepped? Good. Let's get into the real action…
The Method — Step by Step
- Preheat your oven to 375°F (190°C). Line a baking sheet with parchment paper or a silicone mat to prevent sticking. The baking sheet should be at room temperature; a cold sheet can cause uneven baking. This is the moment you set the foundation for the cookie’s structure.
- In a large bowl, cream the softened butter with brown sugar until light and fluffy. Use a stand mixer or hand mixer on medium speed for about 2 minutes. The mixture should look pale and airy, indicating proper creaming. If it feels dense, let it sit for a few minutes to soften further.
- Add the granulated sugar and beat for another minute until fully incorporated. The sugars should dissolve into the butter, forming a smooth batter. This step is critical; any lumps will affect the cookie’s texture.
- Beat in the eggs, one at a time, ensuring each is fully integrated before adding the next. The batter should become glossy and smooth. If the mixture looks curdled, give it a quick stir to re‑emulsify.
- Stir in the vanilla extract, a splash of almond or coconut extract can add a subtle twist. This is where the aroma starts to build, and you’ll already be dreaming of the final cookies. The vanilla should be evenly distributed to avoid uneven flavor pockets.
- Sift together the flour, baking soda, and salt in a separate bowl. Gradually fold the dry mixture into the wet batter until just combined. Overmixing here can create tough cookies; aim for a gentle fold that keeps the dough light.
- Fold in the chocolate chips and candy pieces with a silicone spatula, ensuring even distribution. This is the trickiest step: too much force will crush the candy, too little will leave pockets of empty dough. Keep the dough cold by refrigerating it for 15 minutes before this step if you find it too soft.
- Drop rounded tablespoonfuls of dough onto the prepared baking sheet, spacing them about 2 inches apart. Gently press the tops to flatten slightly; this helps the cookies spread evenly. The dough should hold its shape, not spread excessively.
- Bake for 10–12 minutes, or until the edges are golden brown and the centers still look slightly underbaked. The cookies should smell toasty, with a faint caramel aroma. This is the moment of truth; if you’re unsure, pop the oven light and check the edges.
- Remove the cookies from the oven and let them cool on the sheet for 5 minutes before transferring to a wire rack. The double bake technique comes into play here: after the initial cool, place the cookies back in a low‑temperature oven (300°F/150°C) for 3–4 minutes to set the chocolate without over‑browning. This gives the cookies a glossy finish and locks in the candy crunch.
That’s it — you did it. But hold on, I've got a few more tricks that'll take this to another level…
Insider Tricks for Flawless Results
The Temperature Rule Nobody Follows
Many bakers bake at 375°F, but the secret to a perfect cookie lies in starting at 350°F and finishing at 375°F. The lower start allows the dough to set without over‑browning, while the higher finish ensures the edges caramelize beautifully. I’ve tested this on several batches and the difference is unmistakable. If you’re using a convection oven, reduce the temperature by 25°F.
Why Your Nose Knows Best
The aroma of baking cookies is a reliable indicator of doneness. When the scent turns from sweet to slightly nutty and caramelized, the cookies are ready. This sensory checkpoint saves you from overbaking and guarantees the gooey center. Trust your nose; it’s the best judge of a cookie’s readiness.
The 5-Minute Rest That Changes Everything
After the initial bake, let the cookies rest on the sheet for exactly five minutes before transferring them. This short rest allows the chocolate to set and the dough to firm up, preventing the cookies from spreading too much on the rack. It also makes them easier to handle, reducing the chance of breakage.
The Double Bake Trick
A quick second bake at 300°F for 3–4 minutes locks in the chocolate’s glossy finish without overcooking. The trick is to keep the temperature low; high heat will burn the candy and cause the chocolate to seize. I’ve found that this method gives the cookies a professional finish that looks as good as it tastes.
The Sweet Spot for Candy Pieces
When folding in candy, aim for 20% candy by volume relative to the dough. Too many pieces can cause uneven distribution and a bitter aftertaste. If you love candy, you can increase the ratio to 30% but be prepared for a slightly sweeter cookie. The key is balance; too much candy can overpower the chocolate chips.
Creative Twists and Variations
This recipe is a playground. Here are some of my favorite ways to switch things up:
Dark Chocolate Monster
Swap regular chocolate chips for dark chocolate chips and add a pinch of sea salt to the dough. The bitterness of the dark chocolate pairs beautifully with the candy’s sweetness, creating a sophisticated flavor profile that adults will love.
Nutty Crunch Edition
Add chopped toasted almonds or pecans to the dough for an extra layer of crunch. The nuts add a buttery depth that complements the candy, while the toasted flavor enhances the overall richness.
Spiced Surprise
Incorporate a teaspoon of ground cinnamon or a dash of nutmeg into the dry mix. The warm spices add a subtle complexity that elevates the cookie’s flavor, especially during fall or winter gatherings.
Coconut Cream Delight
Replace half of the butter with coconut oil and fold in shredded coconut. The coconut adds a tropical note and a chewy texture that pairs well with chocolate and candy.
Minty Monster
Add a few drops of peppermint extract and use white chocolate chips instead of regular chocolate. The minty freshness cuts through the sweetness, creating a refreshing contrast that’s perfect for summer parties.
Gluten-Free Adventure
Swap all-purpose flour for a 1:1 gluten-free blend and add 1 teaspoon of xanthan gum. The cookies will retain their structure and chewiness, making them suitable for gluten‑sensitive guests.
Storing and Bringing It Back to Life
Fridge Storage
Store cookies in an airtight container at room temperature for up to 5 days. If you’re in a humid climate, place a paper towel in the container to absorb excess moisture and keep the cookies crisp on the edges.
Freezer Friendly
Freeze the baked cookies in a single layer on a parchment paper sheet for 24 hours, then transfer to a freezer bag. They’ll keep well for up to 3 months. When ready to eat, thaw at room temperature for 30 minutes or warm in a 300°F oven for 5 minutes.
Best Reheating Method
To revive a stale cookie, sprinkle a tiny splash of water over it and microwave on high for 10–15 seconds. The water creates steam that softens the cookie’s crumb while preserving the chocolate’s melt. This trick is a game‑changer for those who love a fresh bite after a few days.