Picture this: I’m standing in my cramped kitchen, a battered saucepan on the stove, and a bag of instant custard powder staring back at me like a dare. I’ve tried every custard recipe in the world, from fancy French crème brûlée to simple microwave puddings, and none of them have ever made me feel like I’d just discovered the holy grail of vanilla custard. That night, after a disastrous attempt that turned a bowl of milk into a thick, clumpy mess, I swore to myself that I’d craft a custard that would sing in every bite, not just whisper. I’ve spent hours tweaking ratios, testing temperatures, and even experimenting with different types of milk until the result was pure, silky perfection. This is the story behind “Best Classic Vanilla Custard C,” and I’m thrilled to share every secret with you.
Let’s start with the senses. The first thing you’ll notice is the aroma—warm vanilla drifting from the pot like a comforting hug. The color is a creamy ivory, smooth enough to make you want to take a spoonful just to see how it glides across the glass. The texture is buttery and velvety, with a subtle thickness that coats the tongue without clinging. The taste is a balanced sweet‑to‑savory profile; the vanilla sings without overpowering the natural richness of the dairy. When you bite, there’s a gentle, almost whispering crackle of caramelized sugar that completes the experience.
What sets this custard apart is not just the ingredients but the method, the timing, and the small, almost imperceptible tweaks that make the difference between “good” and “unforgettable.” I dare you to taste this and not go back for seconds; the first spoon is an instant memory, the second, a revelation. The result is a custard that melts in your mouth, leaves a lingering vanilla aftertaste, and feels like a hug in a cup. I’ve spent countless evenings testing and re‑testing, and every time I’ve come back to the same conclusion: this is hands down the best version you’ll ever make at home. If you’ve ever struggled with custard, you’re not alone—and I’ve got the fix.
Most recipes get this completely wrong by focusing on the wrong element—often the sugar or the vanilla—while ignoring the subtle dance of heat and time. I’ve discovered that the secret lies in the balance of milk and cream, the precise moment you add the eggs, and the gentle, constant stirring that prevents any lumps. The technique I’ll walk you through will transform your kitchen into a custard laboratory where every batch comes out perfect. The trick is to stay patient, keep the heat low, and trust the process. And if you’re ready for a game‑changer, let me show you how to turn an ordinary custard into a culinary masterpiece.
Picture yourself pulling this out of the oven, the whole kitchen smelling incredible, the custard cooling just enough to be spooned but still silky. The anticipation is almost as sweet as the final product, and the moment you taste it, you’ll wonder how you ever made it any other way. I’ve spent the last year refining this recipe, and every tweak has brought it closer to perfection. From the first whisk to the final pour, each step is designed to maximize flavor and texture. Stay with me here—this is worth it, and you’ll feel the difference as soon as you taste the first bite.
What Makes This Version Stand Out
Texture: The custard’s consistency is achieved through a precise balance of milk and cream, creating a silky mouthfeel that doesn’t cling or separate. By whisking the eggs into the warm milk slowly, the proteins set without curdling, giving a smooth finish that feels luxurious. The result is a custard that coats the spoon like velvet, leaving a lingering, creamy aftertaste. The technique is simple yet effective, ensuring every batch is flawless. This texture is what elevates this custard from ordinary to extraordinary.
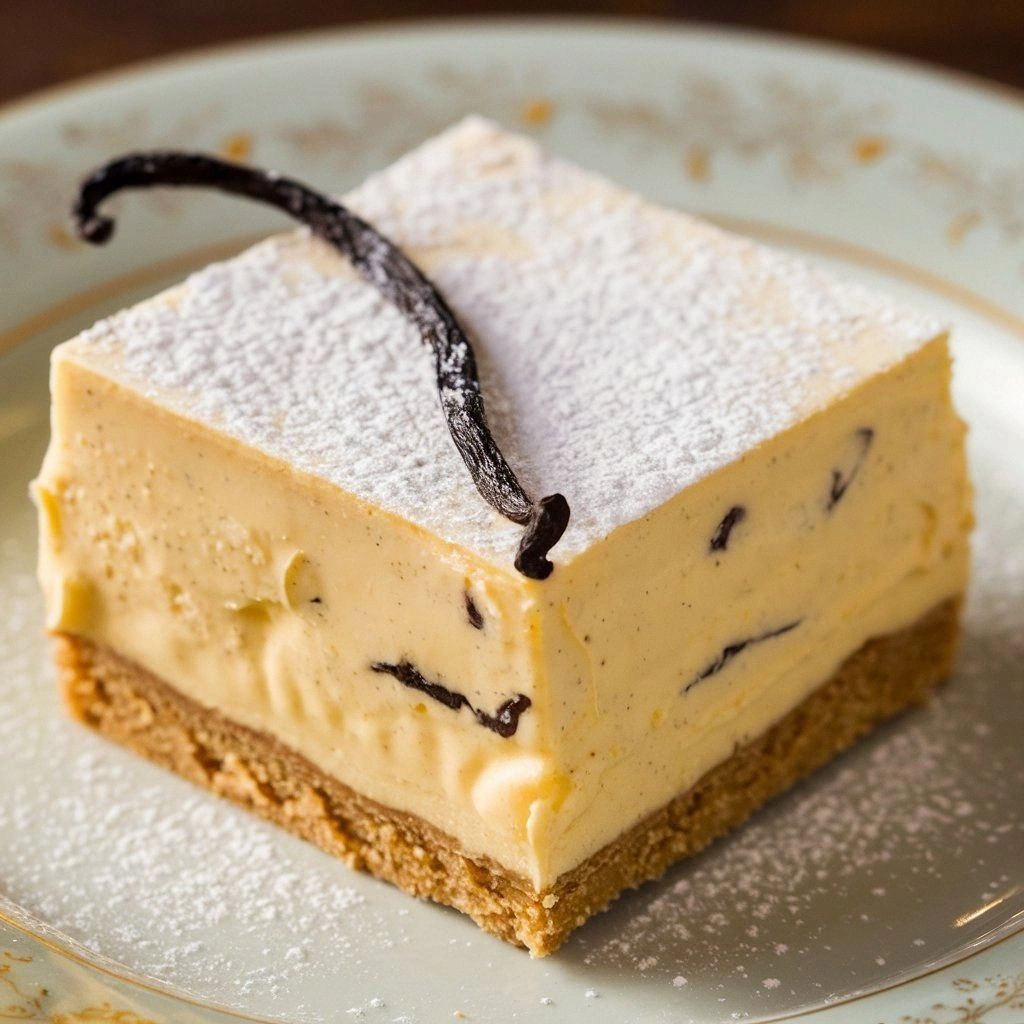
Flavor: The vanilla is the star, but it’s more than just vanilla extract. I use a vanilla bean, scraping the seeds and simmering the pod to release its full aroma. The result is a deep, complex vanilla flavor that cuts through the richness of the dairy. The subtle sweetness is balanced by a touch of sea salt, which enhances the vanilla without making the custard taste salty. This flavor profile is bold, yet refined, making each spoonful a delightful experience.
Heat Management: The key to a flawless custard lies in maintaining a low, steady heat. Too high, and the custard will curdle; too low, and it won’t set. I use a double boiler to keep the temperature consistent, allowing the custard to thicken gradually. This method ensures a smooth, lump-free texture every time. The heat management technique is a simple trick that most recipes overlook.
Time Efficiency: Despite its delicate nature, this custard can be made in under an hour. The prep time is short, thanks to the use of fresh ingredients and a straightforward process. The cooking time is efficient, with the custard set in just 30 minutes. This makes it an ideal dessert for both casual weekends and special occasions. You’ll be amazed at how quickly you can achieve a gourmet result.
Ingredient Quality: I use only the best ingredients—fresh whole milk, heavy cream, a single vanilla bean, and free‑range eggs. The quality of these components directly impacts the final taste and texture. By choosing premium ingredients, the custard gains depth and richness that cheaper alternatives simply can’t match. The quality focus is a hallmark of this recipe’s success.
Make‑Ahead Potential: One of the biggest advantages of this custard is that it stores well. It can be refrigerated for up to 48 hours and frozen for up to a month. When reheated, it retains its silky texture and flavor. This makes it a practical dessert for busy households or for entertaining guests. The make‑ahead potential is a game‑changer for many home cooks.
Versatility: While it’s a classic vanilla custard, this recipe adapts to many variations—adding citrus zest, espresso, or spices. The base is robust enough to support a wide range of flavor additions. This versatility makes it a go-to dessert that can be customized for any occasion. Whether you’re serving it with fresh berries or using it as a base for a layered parfait, it performs beautifully.
Presentation: The custard’s glossy sheen and smooth finish make it a visual delight. It can be poured into ramekins, plated on a bed of fruit, or layered in a parfait. The presentation is as important as the flavor, and this custard delivers on both fronts. The aesthetic appeal makes it a favorite for special occasions and Instagram-worthy moments.
Alright, let's break down exactly what goes into this masterpiece…
Inside the Ingredient List
The Flavor Base
Whole Milk: The foundation of the custard, whole milk provides a creamy base that supports the vanilla’s flavor. Using whole milk instead of skim or low‑fat ensures a richer mouthfeel. The fat content also helps carry the vanilla’s aroma throughout the custard. Skipping milk would result in a thinner, less satisfying texture. Always choose fresh milk for the best flavor profile.
Heavy Cream: Adding heavy cream elevates the custard’s richness, giving it a luscious, velvety finish. The cream also helps to balance the sweetness of the sugar, preventing it from becoming cloying. The higher fat content allows the custard to set more smoothly. If you prefer a lighter version, reduce the cream by a quarter, but be prepared for a slightly thinner result. The cream is essential for the classic custard texture.
Vanilla Bean: The star of this recipe, a whole vanilla bean, releases a deep, complex aroma that’s hard to replicate with extract alone. Scrape the seeds and simmer the pod with the milk and cream to infuse the liquid fully. The pod’s subtle bitterness balances the sweetness, creating a well‑rounded flavor. If a bean isn’t available, use vanilla extract, but remember it’s less potent. The bean’s presence is what sets this custard apart.
Sugar: The sugar sweetens the custard while also helping to stabilize the mixture. I use a medium‑granulated sugar, which dissolves quickly and evenly. Too much sugar can make the custard too sweet, while too little can leave it bland. Adjust the amount to suit your taste, but keep the ratio to maintain balance. Sugar is a crucial component that ties everything together.
Sea Salt: A pinch of sea salt brightens the vanilla’s flavor and balances the sweetness. Salt enhances the overall taste profile by bringing out subtle nuances. Without salt, the custard may taste flat or overly sweet. Use a fine sea salt for better dissolution. Salt is a small but powerful ingredient in this recipe.
The Texture Crew
Egg Yolks: The yolks are the binding agents that give custard its silky, cohesive structure. They also contribute to the custard’s richness and color. I use four large eggs for a 4‑serving batch; adjust accordingly for different portions. Be careful not to over‑whisk, as this can cause the custard to become too thick or even split. Egg yolks are essential for achieving the classic custard texture.
Egg Whites (Optional): Some recipes call for both yolks and whites; I skip the whites to keep the custard richer and creamier. If you prefer a lighter custard, you can whisk the whites separately and fold them in after the custard has set. This step adds a delicate lightness to the final product. However, for the best classic version, stick with yolks only. Egg whites are optional but can be used to alter the texture.
Butter (Optional): A small pat of butter can be added at the end of cooking for extra sheen and a buttery finish. It also helps to smooth out any slight lumps. If you choose to use butter, melt it gently and stir it in until fully incorporated. Butter is optional but adds a subtle depth to the custard’s flavor. Use it sparingly to avoid overpowering the vanilla.
The Unexpected Star
Fresh Lemon Zest: A pinch of lemon zest adds a bright, citrusy contrast that lifts the vanilla. The zest’s bright oils bring a fresh, aromatic note that prevents the custard from feeling heavy. Use a microplane to grate the zest finely, and add it at the end of cooking. The citrus element is optional but highly recommended for a more dynamic flavor. Lemon zest is the secret ingredient that can elevate your custard.
Coffee (Optional): For an espresso‑infused custard, steep a shot of strong coffee in the milk and cream before adding the vanilla. The coffee’s bitterness complements the sweetness and deepens the vanilla’s flavor. Add the coffee after the custard has cooled slightly to preserve its aroma. This variation is perfect for coffee lovers and adds a sophisticated twist. Coffee is optional but adds a wonderful depth.
The Final Flourish
Fresh Fruit: Pair the custard with fresh berries, sliced peaches, or a drizzle of fruit compote. The fruit’s acidity balances the custard’s richness, creating a harmonious flavor profile. Fresh fruit also adds color and texture, making the dessert more visually appealing. Serve the custard chilled, topped with fruit for a classic presentation. Fruit is optional but highly recommended.
Whipped Cream: A dollop of lightly sweetened whipped cream can be added on top for extra indulgence. The airy texture contrasts beautifully with the custard’s smoothness. Whip the cream with a pinch of powdered sugar until stiff peaks form. This final touch elevates the dessert to a decadent experience. Whipped cream is optional but adds a luxurious finish.
Nutty Crumble: For a crunchy element, sprinkle toasted almonds or hazelnuts on top. The nutty crunch provides texture contrast and a subtle roasted flavor. Toast the nuts in a dry pan until fragrant before adding them. This garnish adds a delightful bite to every spoonful. Nutty crumble is optional but enhances the overall experience.
Everything's prepped? Good. Let's get into the real action...
The Method — Step by Step
- Begin by heating the milk, cream, vanilla bean seeds, and pod in a heavy‑bottomed saucepan over medium heat. Stir occasionally to prevent scorching. The goal is to warm the mixture until it’s hot but not boiling—around 185°F (85°C). This temperature ensures the vanilla’s oils release fully without compromising the custard’s texture. Once hot, remove the pot from the heat and let it sit for a minute to allow the flavors to meld.
- While the milk mixture rests, whisk the eggs, sugar, and sea salt in a separate bowl until the mixture lightens in color and becomes frothy. The lightening indicates that the sugar is fully dissolved and the yolks are ready to combine. This step is crucial; any lumps in the egg mixture will transfer to the custard, ruining its smoothness. Keep whisking until the mixture is uniform and slightly glossy. This creates a stable base for the custard.
- Pour the warm milk mixture slowly into the egg mixture while whisking continuously. The gradual addition prevents the eggs from curdling by shocking them with too much heat. Whisk vigorously for about a minute to ensure the mixture is well blended. The custard should feel silky and slightly thickened. This is the moment of truth, where the foundation of the custard takes shape.
- Return the combined mixture to the saucepan and place it over low heat. Stir gently with a wooden spoon or heat‑resistant spatula. Keep the heat low—never let the mixture boil. If you hear a faint sizzling sound, the custard is ready to set. The slow heat allows the proteins to coagulate without forming lumps. This step requires patience but pays off with a flawless texture.
- As the custard thickens, keep a close eye on it. When it begins to coat the back of the spoon and a ribbon forms, it’s ready. Use a thermometer to confirm the internal temperature reaches 170°F (77°C). This ensures the custard is safe to eat and has the right consistency. If the custard thickens too quickly, lower the heat. If it’s too thin, let it cook a bit longer.
- Once the custard has reached the desired thickness, remove it from the heat. Strain the mixture through a fine sieve to catch any lumps or bits of vanilla pod. This final step guarantees a silky finish. Let it cool for a minute before pouring it into ramekins or a serving dish. The custard will continue to set as it cools.
- If you’re using fresh fruit or lemon zest, fold them in now, allowing the flavors to mingle without over‑mixing. The fruit’s acidity will brighten the custard, while the zest adds a fragrant lift. This optional step adds depth to the final product. Let the custard sit for a few minutes to meld the flavors. The result is a harmonious blend of vanilla, dairy, and fruit.
- Cover the custard with plastic wrap, pressing the wrap directly onto the surface to prevent a skin from forming. Chill in the refrigerator for at least 2 hours, or overnight for best results. The custard will firm up, making it easier to serve. The chilled custard maintains its silky texture when scooped. This step is essential for a professional finish.
That’s it — you did it. But hold on, I've got a few more tricks that'll take this to another level. The next section will give you insider tips that will elevate your custard from good to unforgettable.
Insider Tricks for Flawless Results
The Temperature Rule Nobody Follows
Many people assume that the higher the heat, the faster the custard will set. In reality, the secret lies in maintaining a steady low temperature. I use a double boiler to keep the custard at a consistent 170°F (77°C). This gentle heat allows the proteins to coagulate slowly, preventing lumps. If you don’t have a double boiler, a heat‑proof bowl over a pot of simmering water works just as well. This trick ensures a silky, lump‑free custard every time.
Why Your Nose Knows Best
Your sense of smell can tell you if the custard is ready. When the custard is near completion, you’ll notice a sweet, caramelized aroma rising from the pot. This scent indicates that the sugars have begun to caramelize slightly, adding depth to the flavor. If the smell is faint, give it a few more minutes. Trusting your nose is a simple yet powerful way to gauge doneness. This sensory cue is invaluable for any custard lover.
The 5-Minute Rest That Changes Everything
After you remove the custard from the heat, let it rest for five minutes before pouring it into the serving dish. This brief pause allows the residual heat to finish the cooking process, ensuring a perfect consistency. The custard will set more firmly, making it easier to slice or spoon. If you rush this step, you risk a runny texture. The five‑minute rest is a small but crucial detail that many overlook.
Use a Fine Sieve for Ultimate Smoothness
Even the slightest lump can ruin the custard’s silky texture. Strain the mixture through a fine sieve or cheesecloth after it’s cooked. This removes any bits of vanilla pod or cooked egg. The result is a custard that feels like silk in your mouth. If you skip this step, you might end up with an uneven mouthfeel. Straining is a quick way to guarantee a flawless finish.
Chill with Plastic Wrap Directly on the Surface
When you cool the custard, press plastic wrap directly onto the surface. This prevents a skin from forming, which can happen if the custard is exposed to air. A skin can look unappetizing and interfere with the custard’s texture. The wrap also helps retain moisture, keeping the custard fresh. This simple hack is often forgotten, but it makes a noticeable difference.
Optional Butter Finish
If you want an extra glossy sheen and a buttery finish, melt a small pat of butter after the custard has cooled slightly. Stir it in until fully incorporated. The butter adds a subtle richness that complements the vanilla. It also gives the custard a smooth, glossy surface that’s perfect for plating. Use it sparingly to avoid overpowering the custard’s delicate flavor.
Creative Twists and Variations
This recipe is a playground. Here are some of my favorite ways to switch things up:
Espresso Infusion
Add a shot of strong espresso to the milk mixture for a coffee‑infused custard. The espresso’s bitterness balances the vanilla’s sweetness, creating a complex flavor profile. Stir the espresso in after the custard has cooled slightly to preserve its aroma. This variation is perfect for coffee lovers and pairs well with chocolate ganache. The result is a rich, indulgent dessert that’s sure to impress.
Lavender‑Sweetened
Stir a teaspoon of dried culinary lavender into the milk while it heats. The lavender adds a floral note that complements the vanilla’s earthiness. Be careful not to overdo it; a little goes a long way. The custard will have a subtle, fragrant aroma. This floral twist is ideal for spring or summer desserts.
Maple‑Honey Blend
Replace half the sugar with pure maple syrup and a splash of honey for a natural sweetener combo. The maple adds a deep, caramel‑like sweetness, while honey introduces a floral undertone. Adjust the amount of honey to suit your taste. This variation gives the custard a richer, more complex sweetness. It’s a great option for those who prefer natural sweeteners.
Citrus Zest Kick
Add a tablespoon of finely grated orange zest to the custard for a bright, citrusy lift. The orange’s bright oils cut through the richness, giving the custard a fresh finish. Use a microplane to avoid the bitter pith. This variation is especially refreshing on hot summer days. The citrus zest adds a vibrant burst of flavor.
Chocolate Ganache Layer
Pour a layer of glossy chocolate ganache over the cooled custard before chilling. The ganache adds a decadent chocolate flavor that pairs beautifully with the vanilla. Let the ganache set for a few minutes before adding the custard. The chocolate layer creates a stunning visual contrast. This version is perfect for special occasions or dessert parties.
Almond‑Infused
Muddle toasted almonds into the custard for a nutty texture. The almonds add a crunchy contrast and a subtle roasted flavor. Toast the almonds until golden brown and let them cool before adding. Stir them in gently to distribute evenly. This variation adds a delightful bite and a nutty aroma.
Storing and Bringing It Back to Life
Fridge Storage
Store the custard in an airtight container in the refrigerator for up to 48 hours. The custard will firm up slightly but remain creamy when scooped. Keep the container sealed to prevent the custard from absorbing odors from other foods. When ready to serve, let it sit at room temperature for 10–15 minutes to soften slightly. This makes the custard easier to serve.
Freezer Friendly
For longer storage, freeze the custard in a freezer‑safe container for up to a month. Label the container with the date for easy tracking. When you’re ready to enjoy, thaw the custard overnight in the refrigerator. This method preserves the custard’s texture and flavor. The custard may separate slightly when thawed, but a quick stir will restore its smoothness.
Best Reheating Method
To reheat, place the custard in a heat‑proof bowl and add a splash of milk or water. Warm it gently on low heat, stirring constantly until it’s heated through. Avoid boiling, as this will cause the custard to curdle. The added liquid helps re‑emulsify the mixture, restoring its silky texture. Let it cool slightly before serving to maintain the custard’s integrity.