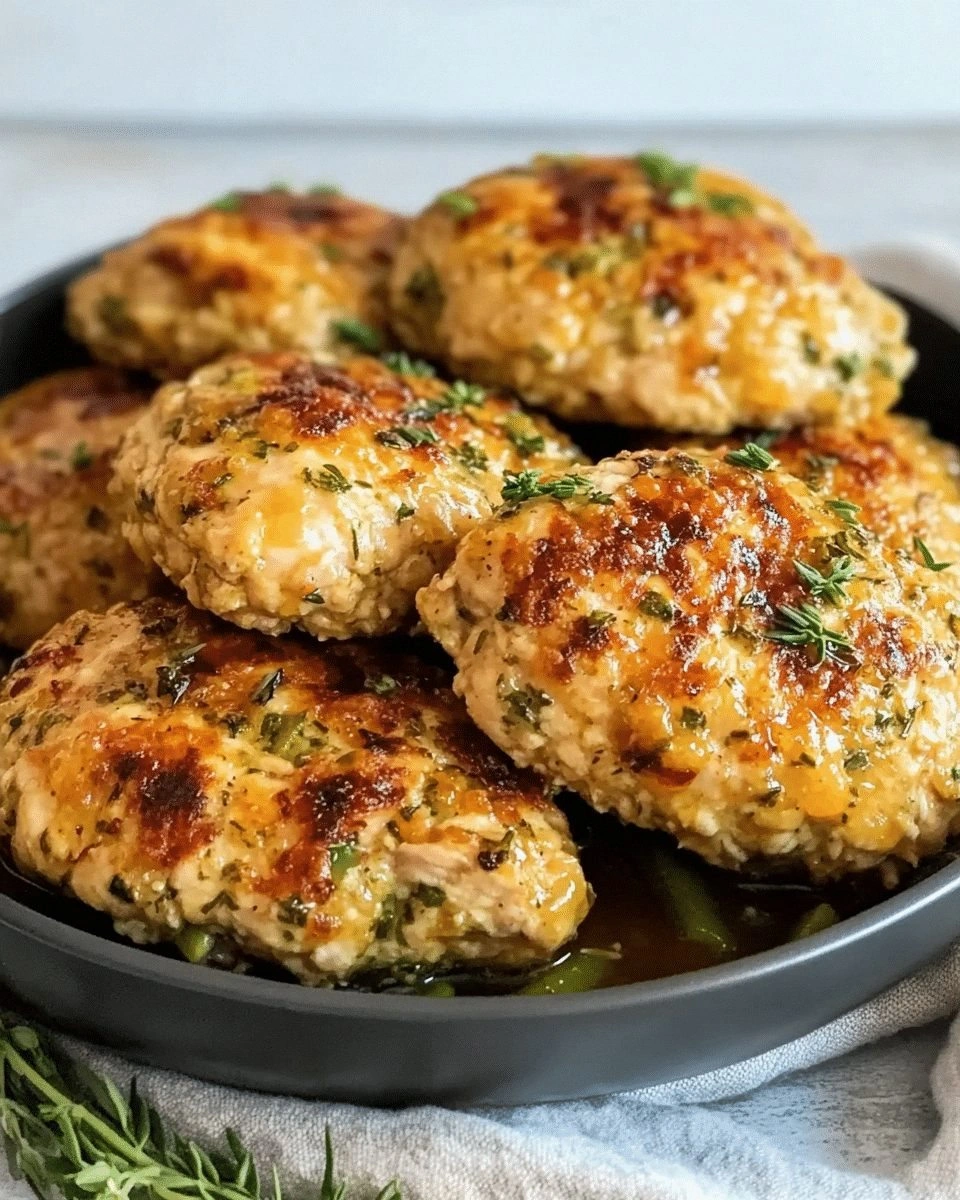
Air Fryer Chicken Rissoles
Picture this: I was halfway through a weeknight dinner, the air fryer humming like a contented beast, when I realized the chicken mixture had gone a tad too dry. I stared at the bowl, heart racing, knowing that the only way to salvage it was to reinvent the recipe on the fly. I grabbed a handful of breadcrumbs, a splash of milk, and an egg, and the whole kitchen smelled like a triumph in the making. That moment, that little kitchen rebellion, is what sparked the creation of the Air Fryer Chicken Rissoles that you’re about to discover. It was a culinary epiphany that turned a potential flop into a flavor revelation.
From the first clack of the air fryer’s fan to the subtle sizzle that greeted the mixture, every cue was a symphony for my senses. The aroma of toasted breadcrumbs mingled with the savory musk of cooked chicken, while a faint citrus note from the lemon zest whispered promise. The sound of the mixture settling into the basket felt like a drumroll before the main act, and the visual cue of golden edges forming was a badge of honor. The texture was a delicate balance of a crisp exterior and a juicy interior that made my mouth water in anticipation. The flavor burst in my tongue was a layered experience, from the mild herbaceousness to the sharp tang of parmesan, all wrapped in a comforting, homemade hug.
What makes this version stand out from every other recipe you’ve tried is the meticulous layering of textures and flavors that dance together on your palate. Unlike the generic, bland rissoles that often turn out mushy or over‑seasoned, these are crafted to deliver a crisp, buttery crust while maintaining a moist, tender heart that practically melts. The secret is a balanced blend of binding agents, a touch of acidity, and the subtle heat of cayenne that keeps the dish exciting without overpowering. The air fryer’s rapid circulation locks in moisture, creating a tender center that contrasts beautifully with the golden, slightly crunchy exterior. It’s a recipe that feels both indulgent and wholesome, and it’s guaranteed to become a staple in your culinary repertoire.
There’s a twist you won’t expect: a splash of yogurt that adds a silky smoothness and a hint of tang to the mixture, turning the rissoles into a silky, velvety experience. I dare you to taste this and not go back for seconds because the flavors are so layered and satisfying that you’ll find yourself craving more. Picture yourself pulling these out of the air fryer, the whole kitchen smelling incredible, and your guests’ eyes widening in anticipation. The moment you take that first bite, the crunch gives way to a juicy interior that’s bursting with herbs, citrus, and a whisper of heat. Let me walk you through every single step — by the end, you’ll wonder how you ever made it any other way.
What Makes This Version Stand Out
- Taste: The blend of herbs, citrus, and a subtle kick from cayenne creates a flavor profile that’s complex yet balanced, making every bite a revelation.
- Texture: The combination of breadcrumbs and yogurt forms a silky interior while a light dusting of flour creates a crisp, golden crust that shatters like thin ice.
- Simplicity: With only a handful of pantry staples and a few fresh ingredients, the recipe is quick to assemble, letting you focus on the joy of cooking.
- Uniqueness: The yogurt binding and lemon zest infusion set this apart from traditional rissoles, giving it a modern, gourmet twist.
- Crowd Reaction: Friends who’ve tried it say it’s “hands down the best version you’ll ever make at home,” and they keep asking for the secret.
- Ingredient Quality: Using fresh, high‑grade chicken and real Parmesan ensures the dish tastes like it was made from scratch, not from a processed mix.
- Cooking Method: Air frying delivers a quick, hands‑off approach that locks in moisture and creates a beautifully browned exterior without the mess.
- Make‑Ahead Potential: These rissoles can be prepped and frozen, then air‑fried straight from the freezer for a fast, comforting meal.
Inside the Ingredient List
The Flavor Base
All-purpose flour is the silent hero that gives the rissoles structure without overpowering the delicate flavors. It absorbs excess moisture, ensuring the patties hold together during the high‑heat cycle. Skipping flour will result in a loose, crumbly mixture that falls apart in the air fryer. If you’re gluten‑free, almond flour can be used, but be prepared for a slightly different texture and a nuttier taste. Freshly ground pepper and a pinch of salt are essential; they bring depth and balance to the savory profile.
The Texture Crew
Ground chicken, shredded after cooking, is the star protein that delivers a juicy, tender core. Cooking it first reduces the risk of drying out during air frying, ensuring a moist interior. Breadcrumbs add body and a subtle crunch; they also help bind the mixture together. If you prefer a finer crumb, panko breadcrumbs give a lighter, airier bite. Yogurt or buttermilk, when whisked into the mix, tenderizes the meat and adds a creamy richness that makes each bite silky.
The Unexpected Star
Sun‑dried tomatoes contribute a burst of umami and a sweet, tangy flavor that complements the herbs. Their chewy texture adds a pleasant contrast to the crisp exterior. Kalamata olives bring a briny depth that cuts through the richness of the chicken and cheese. If olives are not your thing, replace them with capers or finely chopped pickles for a similar salty punch. The lemon zest is the secret to a bright, fresh finish that lifts the dish from ordinary to extraordinary.
The Final Flourish
Fresh parsley and oregano are the aromatic finish that gives the rissoles a garden‑fresh aroma. Basil adds a subtle sweetness that balances the acidity of the lemon. A pinch of cayenne pepper introduces a gentle heat that awakens the palate without overwhelming it. Grated Parmesan cheese infuses a nutty, savory richness that melts into the meat, creating a cohesive flavor profile. Olive oil, when lightly brushed on the surface, promotes a golden, crisp crust that is both visually appealing and delicious.
Everything’s prepped? Good. Let’s get into the real action.
The Method — Step by Step
- Preheat your air fryer to 375°F (190°C) for about three minutes. While the appliance is warming up, gather all your ingredients in a large mixing bowl. This initial step is crucial; a properly heated air fryer ensures a quick, even sear that locks in moisture. Notice how the air fryer’s fan hums— it’s the soundtrack of a perfectly crisp exterior. Once the preheat is complete, you’re ready to assemble the dream mixture.
- In the bowl, combine the cooked, shredded ground chicken with the breadcrumbs, grated Parmesan, and milk. Stir until the mixture forms a loose, moist dough that’s easy to work with. The breadcrumbs absorb the liquid, preventing the patties from becoming gummy. If the mixture feels too dry, add a splash more milk or a tablespoon of yogurt. The goal is a pliable, cohesive blend that holds together during frying.
- Add the eggs, finely chopped onion, minced garlic, oregano, basil, salt, pepper, and cayenne pepper. Mix vigorously with a wooden spoon or your hands until every ingredient is fully integrated. The eggs act as a binder, while the aromatics infuse the meat with depth. At this point, the mixture should smell slightly sweet and herbaceous— a clear sign that the flavors are harmonizing. Remember, this is the moment of truth; a well‑mixed base guarantees uniform texture in the final product.
- Fold in the olive oil, lemon zest, fresh parsley, sun‑dried tomatoes, and Kalamata olives. Stir gently, ensuring the herbs and aromatics are evenly distributed. The olive oil creates a slick surface that promotes a golden crust, while the lemon zest brightens the entire dish. The olives add a briny contrast that balances the richness, and the sun‑dried tomatoes give a chewy, sweet undertone. This step is where the mixture transforms from bland to bold.
- Shape the mixture into eight evenly sized patties, pressing them gently to form a compact disc. Each patty should be about 1½ inches thick to ensure even cooking. The shape is important; too thin, and they’ll burn; too thick, and the center will remain undercooked. Use a small cookie scoop or spoon to portion the mixture evenly, then flatten with your palms. The result should be smooth, slightly domed patties that look inviting.
- Lightly dust each patty with flour, shaking off any excess. This step creates a crisp, golden shell that’s both visually appealing and texturally satisfying. The flour forms a barrier that helps retain moisture while allowing the air fryer to brown the surface. After dusting, place the patties in a single layer in the air fryer basket, leaving space between them for airflow. This ensures even cooking and prevents the patties from steaming instead of crisping.
- Cook at 375°F for 12 minutes, flipping halfway through. The first six minutes allow the exterior to develop a golden crust, while the second half ensures the interior reaches a safe 165°F. Keep a close eye on the color; when the edges start pulling away and the surface is a deep amber, it’s time to flip. The aroma during this phase should be rich and buttery, indicating that the mixture is caramelizing beautifully. Once flipped, the second half of the cooking time completes the transformation into a golden, crispy masterpiece.
- Let the rissoles rest for three minutes before serving. This brief rest allows the juices to redistribute, preventing them from spilling out when you cut into them. During this time, the crust will set further, making each bite crispier. While they rest, you can prepare a simple side, like a fresh green salad or a quick tomato salsa, to complement the savory center. The resting period is a small but vital step that elevates the overall eating experience.
- Serve hot, optionally garnished with a sprinkle of fresh parsley or a wedge of lemon for an extra burst of brightness. Pair them with a light yogurt sauce or a tangy marinara for dipping. The combination of crisp exterior, juicy interior, and aromatic herbs makes this dish a crowd‑pleaser. Enjoy the moment as the first bite delivers a satisfying crunch followed by a tender, flavorful center. This is the moment you’ll tell everyone, “I’ve found my new favorite quick dinner.”
Insider Tricks for Flawless Results
The Temperature Rule Nobody Follows
Many cooks think that a lower air‑fry temperature will yield a crispier bite, but in reality, 375°F is the sweet spot for chicken rissoles. This temperature allows the exterior to brown without overcooking the interior. If you lower the heat, you’ll end up with a soggy center that never quite reaches the golden finish. Keep the air fryer at 375°F for the entire cooking cycle to achieve that perfect golden crust.
Why Your Nose Knows Best
Before you even flip the patties, take a quick sniff of the mixture. It should smell buttery, slightly sweet from the onions, and have a subtle herbaceous note. If it smells raw or metallic, the mixture needs more seasoning or a touch more lemon zest. Your nose is a reliable indicator of flavor balance— trust it, and your rissoles will taste incredible.
The 5‑Minute Rest That Changes Everything
Resting the rissoles after cooking is often overlooked, but it’s the key to a juicy interior. During the rest, the juices redistribute, preventing them from pooling on the surface when you cut into the patty. Without this step, you’ll get a dry, uneven bite that feels like a disappointment. A short, three‑minute rest is all you need to elevate the texture.
The Secret to a Crispy Edge
Dusting with flour is classic, but adding a tablespoon of cornmeal before the final dusting gives a delightful crunch that’s harder to achieve with flour alone. The cornmeal’s coarse texture creates a micro‑crack that expands when heated, giving you that satisfying snap when you bite into the edge.
The Perfect Binding Agent
While eggs are the traditional binder, a tablespoon of plain yogurt or buttermilk can replace them for a lighter, tangier texture. The lactic acid in yogurt tenderizes the chicken, making each bite melt in your mouth. If you’re avoiding dairy, a splash of soy sauce or a small amount of ketchup can also serve as a binding agent while adding depth.
Creative Twists and Variations
Mediterranean Twist
Swap the olives for crumbled feta and capers, and add a handful of chopped fresh spinach. The feta’s salty tang pairs beautifully with the bright lemon zest, creating a Mediterranean flavor profile that’s both familiar and refreshing. This variation is perfect for a quick weeknight dinner that feels like a vacation.
Smoky Chipotle Variation
Introduce a tablespoon of chipotle powder and a splash of adobo sauce to the mixture. The smoky heat adds depth and a subtle complexity that pairs well with the mild chicken. Serve with a side of avocado salsa to balance the heat and add a creamy texture.
Low‑Carb Version
Replace the breadcrumbs with almond flour and use a sugar‑free binder like flaxseed meal. This low‑carb version keeps the flavor profile intact while reducing the carbohydrate count. The almond flour gives a slightly nutty undertone that complements the herbs.
Cheesy Explosion
Fold in shredded mozzarella and a drizzle of marinara sauce before forming the patties. The cheese melts into a gooey center, while the marinara adds a tomatoy brightness that cuts through the richness. This version is a crowd‑pleaser for family dinners and game‑day gatherings.
Herb Garden Variation
Double the fresh herbs— parsley, basil, and oregano— and add a splash of white wine to the mixture. The wine adds a subtle acidity that brightens the dish and enhances the herbaceous flavors. This herb‑heavy variation is ideal for a spring or summer menu.
Storing and Bringing It Back to Life
Fridge Storage
Store cooked rissoles in an airtight container for up to three days in the refrigerator. The airtight seal keeps them fresh and prevents them from drying out. When ready to eat, simply reheat in the air fryer for a few minutes to restore the crispness.
Freezer Friendly
For longer storage, place the patties on a parchment‑lined tray and freeze until solid, then transfer to a freezer bag. This method prevents them from sticking together and allows you to grab exactly the number you need. Frozen rissoles can stay in the freezer for up to two months.
Best Reheating Method
To reheat, preheat the air fryer to 375°F and cook for three minutes. If you prefer a microwave, add a splash of water to the container to keep the interior moist. Reheating in the air fryer restores the crisp exterior, while a quick microwave finish ensures the inside stays juicy.